Go Play Outside Now

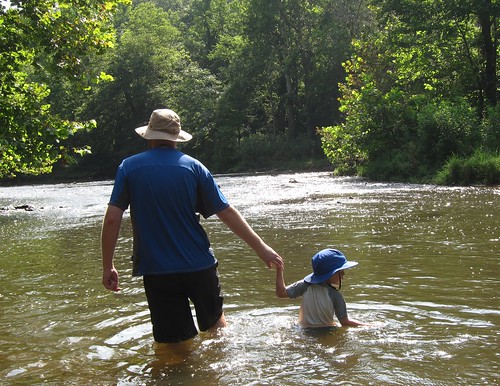
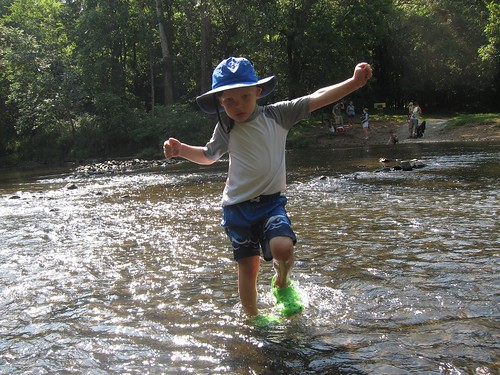
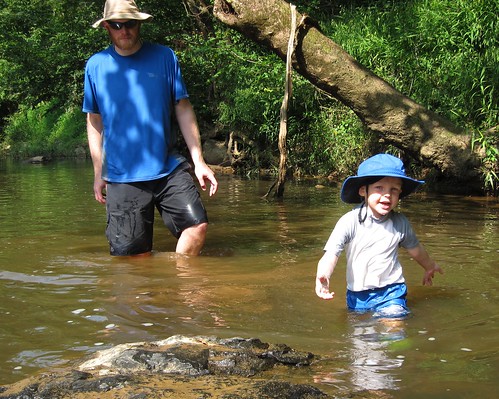
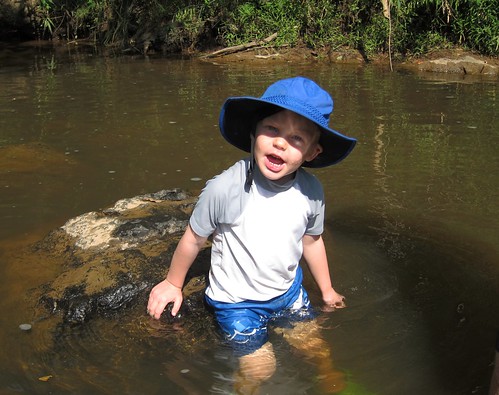
Since the weather forecast predicted a nice Saturday and a stormy Sunday, we spent this past Friday evening kicking around some ideas for outdoor activities for the first half of the weekend. When we called this morning about a Tar River tubing trip that looked fun, it turned out that Griff didn’t meet the age requirements. After scrambling around for a Plan B, we hopped into the car and headed to Go Play Outside Now, a private outdoor playground near Garner.

Go Play Outside Now is similar to Three Bears Acres in that they’re both spacious semi-wooded areas with natural play areas, slides, water activities, etc. GPON doesn’t take credit cards, which we only found out about on arrival. Luckily there’s a nice gas station just up the road with a CashPoints. The gas station is also a good place to grab some last-minute snacks, since there are no food concessions at the park (but bringing in outside food is fine). GPON is significantly cheaper than Three Bears at $5/person for 2 hours or $10/person for all day. We chose the latter option and ended up staying for 5 hours or so.

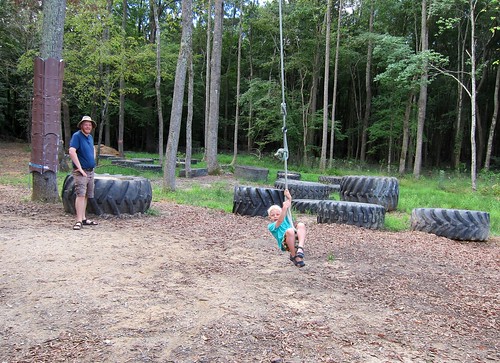
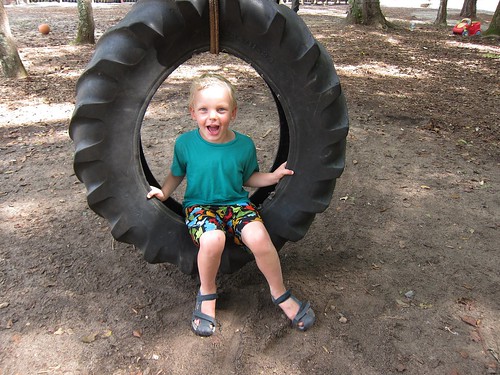
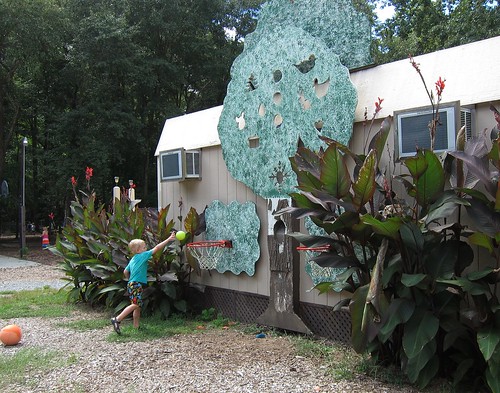
We all had a great time. There were rope and tire swings, a huge sandbox area with kiddie pools and a volleyball net, a play campground, a basketball court, swingsets, climbing structures, teepees to hide in, and a large laser tag area that will interest Griff when he’s a little older. There were lots of shady picnic tables for eating and resting.

Rope swing

Tire swing

Basketball and beanbag toss

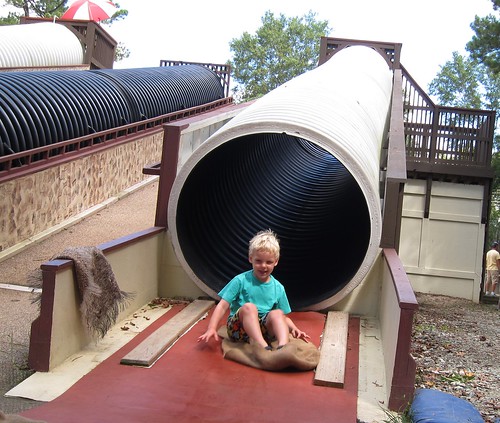
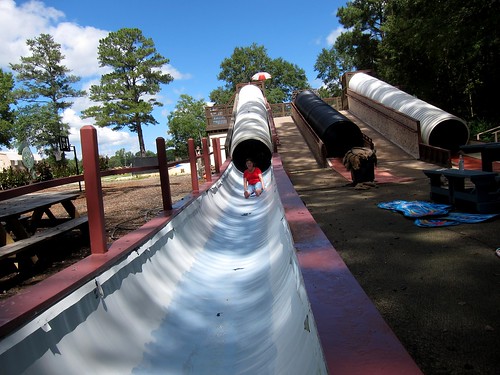
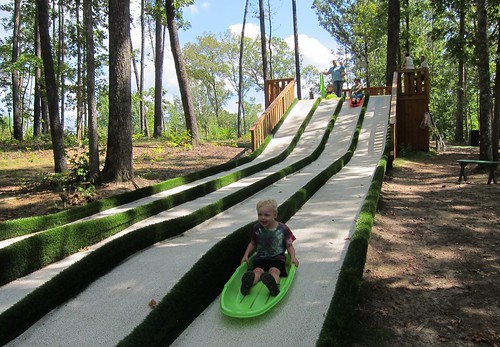
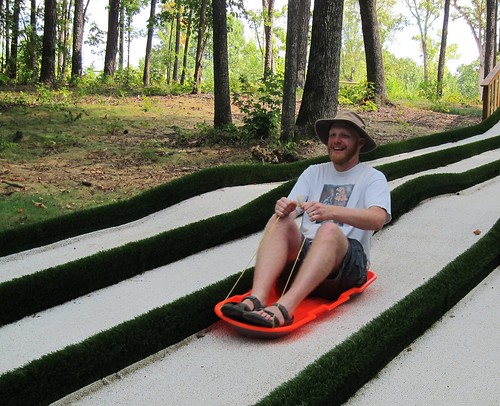
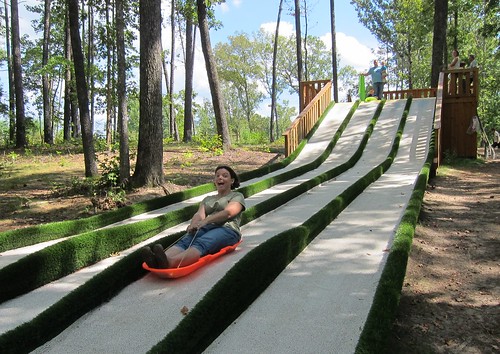
For us, though, the big attraction was the slides. There were two dry tube slides with burlap sacks to slide down on, and a third slide that operates as a water slide during the summer. The water slide requires 2 staffers to run, and is open intermittently through the day (laser tag is going on while the slide is closed).

The dry slides were great.

Dry tube slide

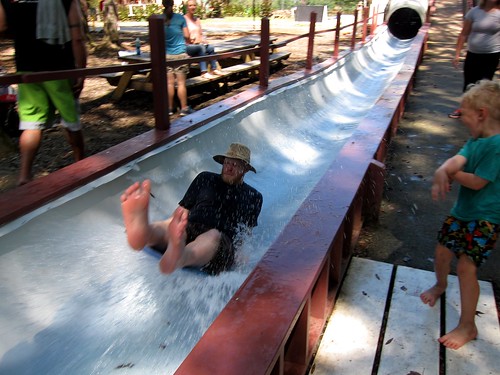
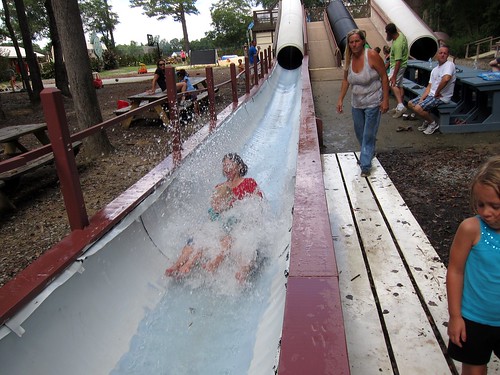
The water slide, though, was awesome. There’s a no-swimsuit rule in the park, so you have to ride the water slide fully clothed (but barefoot). Luckily, we had brought extra clothes for everyone. As you might guess, the heavier the rider, the faster the ride and the bigger the splash at the end. When there was a kid riding with parents, the splashes were huge.

Me watersliding

Sean's big splash

Me and Griff on the water slide

One of Griff’s trips down the slide:

One of Daddy’s rides:

Griff and Daddy’s epic splashdown:

We really liked this place. It was clean and well-maintained. There were real bathrooms instead of portapotties (with A/C, aaahhhh), and the staff (mostly the family that owns the property, I think) were all extremely nice. Unlike Three Bears, which is out in the middle of nowhere, GPON has gas stations, restaurants, etc within a mile or two. There were at least three birthday parties going on while we were there, and it didn’t seem at all crowded. We’ll definitely be back.

Comments: Comments Off on Go Play Outside Now

The Saga of Mister (er, Ms.) Stripey

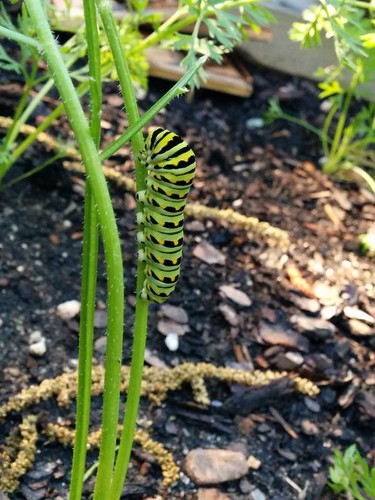
On May 24, we disccovered a swallowtail caterpillar munching on carrot leaves in the garden. The little guy was doing some serious damage to the carrot patch, so leaving him there was not a desirable option. Being a big fan of swallowtail butterflies, I didn’t want to hurt him, either. Our seedling dill plants were still too small to be a viable alternative food source, so after about 5 minutes of deep consideration (ahem), we decided to adopt him. Griff named him “Mister Stripey”.

Mister Stripey eating the carrots

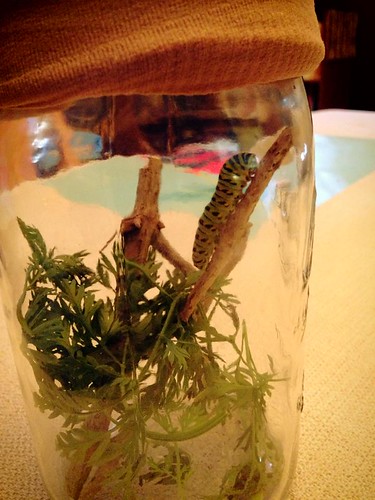
We put him into a quart jar with some carrot leaves and sticks, and he proceeded to make himself at home.

Mister Stripey's initial home

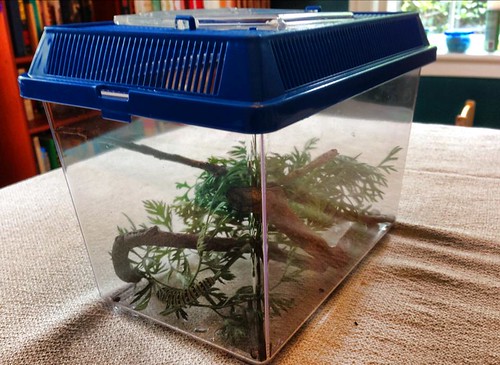
The next morning, we bought a small plastic terrarium that would better accomodate an adult butterfly’s 3-inch wingspan.

Mister Stripey's terrarium

The next few days were spent swapping in fresh carrot greens twice a day (caterpillars are picky about the freshness of their food) and cleaning the caterpillar poop from the terrarium (towards the end of this period, he pooped a LOT). Here he is eating carrot leaves like there’s no tomorrow:

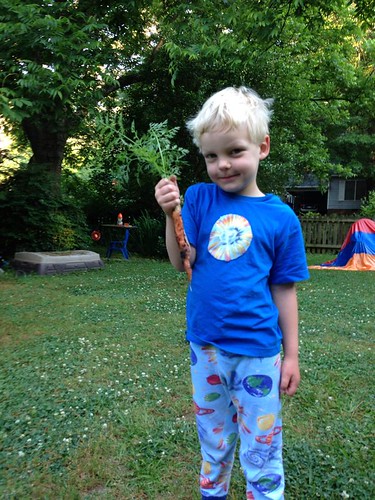
Griff picking carrots for Mister Stripey in his jammies.

Based on his appearance, we learned that he was in the 5th and final instar, or caterpillar molting stage, and that he would spend the next few days eating himself silly before the final transformation.

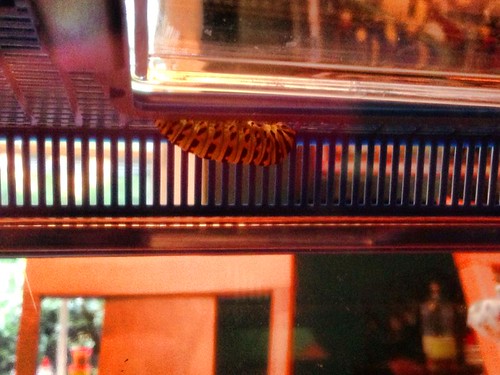
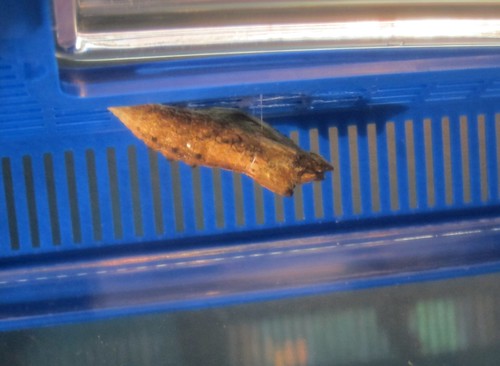
On May 27, he purged himself (ie, had a huge runny poop). We had read that this was a sign he would soon be molting into his chrysalis stage. He ignored all the sticks we had helpfully placed in his terrarium and climbed up to the lid, attatched himself there with silk, and spent about 24 hours motionless in a “J” shape. He began to wiggle around again the night of the 28th, but I gave up watching in the wee hours of the morning, and we woke up to a chrysalis on the 29th.

Mister Stripey in "J" formation prepping for his final molt

Chrysalis hours after formation

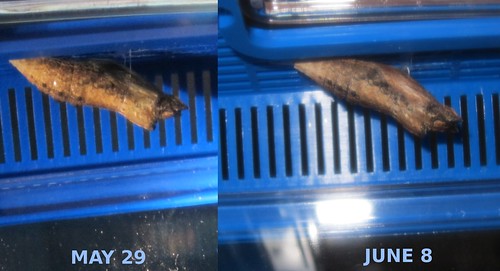
At this point he didn’t need any active care, so we placed the terrarium on a bookshelf near, but not in front of, a window, in a room that got at least 14 hours of combined artificial and natural light. (This amount of light is required to keep the chrysalis from going into diapause, or a sort of winter hibernation.) Since the AC is running all the time, I draped a damp washcloth over part of the terrarium to make sure there was a source of humidity and he wouldn’t dry out. The transformation was very gradual, but on June 8th we noticed that he was definitely looking different: his chrysalis was darker and drier, almost papery looking, and the shape had changed. He was also wiggling in response to his terrarium being moved.

Chrysalis comparison 10 days out

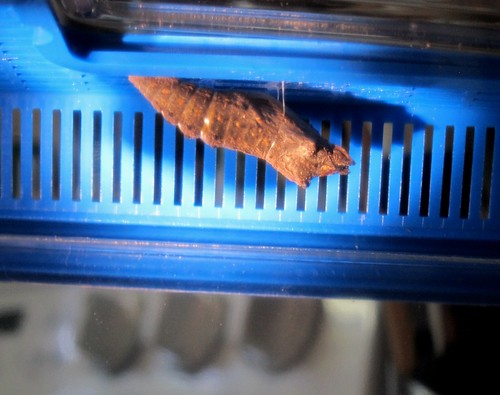
On the morning of the 10th, there was a very noticeable change. The chrysalis was very dark, and looking much more translucent. Throughout the morning, the chrysalis became more and more transparent, to the point that the yellow spots on the black butterfly body and wings inside were visible.

The increasingly transparent chrysalis shortly before eclosion

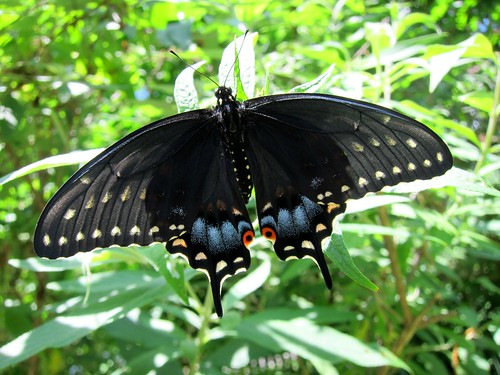
I kept checking every 10 minutes or so, and at one point I noticed that he was making some vigorous wrigging motions. Just in time, I grabbed a camera and a flashlight (since his position on the terrarium lid made the lighting poor) and watched him emerge from the chrysalis. Or, I should say, watched HER emerge: Mister Stripey is a Ms. 🙂

Here’s a video of the emergence. Please excuse the Blair Witch-style hyperventilating and the background noise from the dishwasher. I was really worried she would fall off the lid of the terrarium and damage her wings, but luckily she was fine.

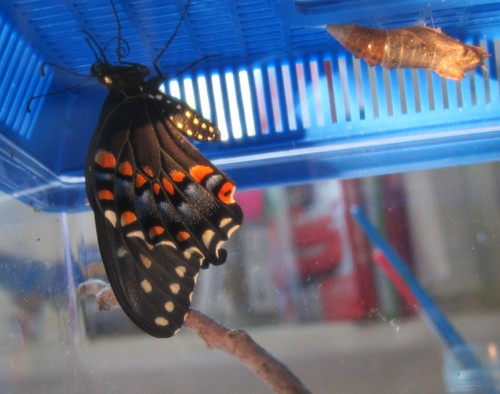
The eclosion happened in under 2 minutes, and if I hadn’t checked back frequently, I would have missed it. Ms. Stripey pumped fluid into her crumpled wings, and within 10 minutes they were fully extended (but not usable or fully dry, yet).

Ms Stripey a few minutes after emerging from her chrysalis

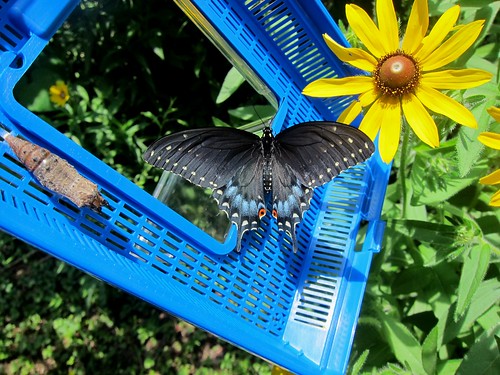
After about 45 minutes she opened her wings fully, and that was when I realized she was a she. She fluttered around a little, but was back to resting quietly when I left the house to pick up Sean at work and Griff at preschool. By the time we got home, she was quite active in the terrarium, and it was clear she was ready to head outside.

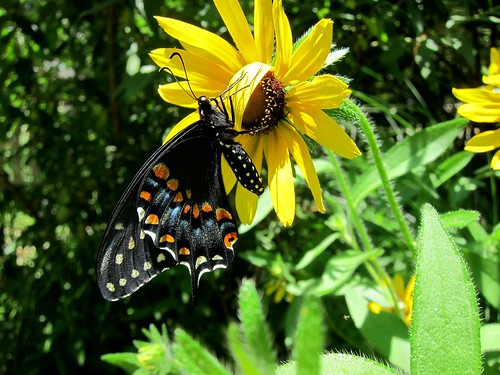
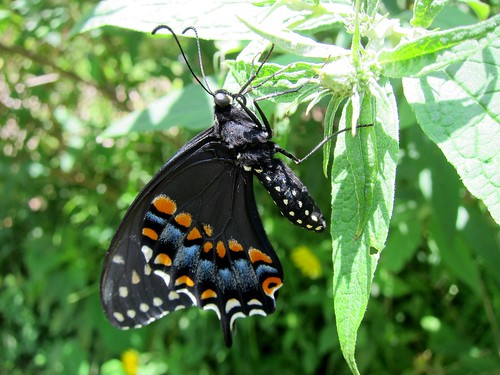
She was hanging up on the terrarium lid again, so Sean held it near a patch of brown-eyed susans that are growing under a butterfly bush in the yard. She readily fluttered onto one of the flowers and spent about 10-15 minutes testing her wings before she hopped up onto the butterfly bush.

Ms. Stripey taking her first flutter outside

Ms Stripey in the sunshine

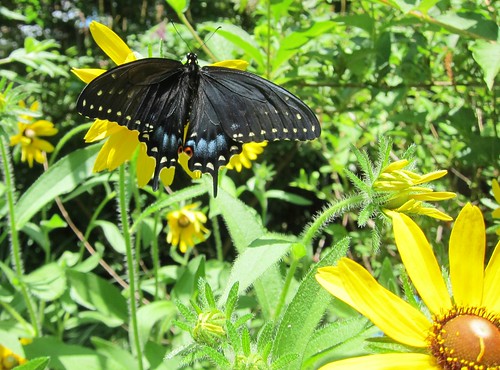
Ms. Stripey spreading her wings

Ms. Stripey in all her glory

Ms Stripey exploring the butterfly bush

We went into the house for lunch, and when we came back outside about 20 minutes later to check on her, she was fluttering in high circles around the butterfly bushes. She made a circuit of the yard, and then rapidly flew away in search of her next big adventure. If we’re really lucky, we may get to raise some of her babies later this summer. Luckily, I planted some extra dill. 🙂

Comments: Comments Off on The Saga of Mister (er, Ms.) Stripey

Picking up where I left off….

Wow, I haven’t posted here since October. Not sure why I had the big break, but I’m feeling excited about getting the garden started back up and I’m working on some fun projects that I feel like sharing.

I stopped sewing new T-shirts for Griff once I realized that his overstuffed shirt drawer was getting really hard to close, and moved on to sewing things for myself. Now that I’ve gotten comfortable sewing with knits, a whole new range of patterns has opened up.

I’ve been wanting to make the Blank Slate Patterns Rose shirt for some time, long before I got up the courage to start sewing T-shirts for Griff. The design element that I find really appealing is the combination of knit fabric with an accent of woven fabric around the neckline. It can be made with any sleeve length from sleeveless to long-sleeved, so it’s an extremely flexible pattern.

I started out with some basic purple interlock from Joann Fabrics (either a cotton or cotton-poly combo, can’t remember which) and a fat quarter of Hoffman quilting cotton that I’ve been hoarding for probably 15 years, if not longer. Based on measurements, I considered myself to be between the XL and L, so I made the XL to see how it turned out. (Note: I took these photos with the self-timer on the camera, and I seem incapable of having a normal expression in that case, so please excuse all the dorky poses).

Closeup of the neckline:

I am extremely happy with how this shirt turned out. The pattern is cut very generously, though, and I felt that it was a little too roomy. I cut all the pattern pieces down to a size L and cast about for some more knit fabric. The only suitable yardage I could find was a rainbow polka dot rib knit I had bought with the intention of making some pajama pants, so I used that. I auditioned a bunch of red quilting fabrics for the neckline, but they were all patterned tone-on-tones that competed with the dots. In desperation (and probably because all the recent cold weather has damaged my brain), I decided to use the only solid red fabric in my stash: red polar fleece. Kind of a weird choice, but if you’re willing to wear a homemade rainbow polka dot shirt, you’re clearly not real picky about bizarre fabric combinations. I decided to add red polar fleece cuffs because you may as well go all-in if you’ve reached this point. Griff took one look at me wearing my new creation and said, “That is a happy shirt!”

The fit on this one was much better. I would have immediately made another one, but I was out of knit yardage in large enough quantities and the snow was due to start. I foresee making myself a bunch of these with 3/4-length sleeves for spring, and a pile more in short-sleeved and sleeveless versions for summer. Some people have made summery variations with stretch lace in the center panel instead of cotton, which would be fun to try. Linen, eyelet, seersucker, or even silk might be interesting.

I’m embarrassed to admit this, but Griff is still sleeping in his toddler bed. He’s no more than a good growth spurt or two away from needing to sleep diagonally, so we’re working on picking out a single bed for him. In the meantime, I’ve gathered a bunch of fabrics to make him a big-boy-bed quilt. He requested “aliens, rocket ships and robots”, so that’s what he’s getting. I’ve added some bright solids and tone-on-tones, and some cool star/celestial fabrics from my quilting stash for borders and sashings.

I also found this awesome space fabric panel. I thought about making it part of the quilt, but I’ve decided that it would be much more fun as a pillowcase or wall hanging.

During the icy/yucky parts of this past week’s snowfall when we didn’t want to be outside, I tried to think up something to keep Griff and I occupied for a few hours. I finally decided to make some Waldorf-style felt gnomes and a gnome house.

The felt gnomes were made using a tutorial at Wee Folk Art. They were very easy. I used a variety of wooden pegs from the craft store and added a few metal and glass beads as accents. Here’s the gnome family:

I half-assed a gnome house out of cereal boxes and masking tape, which we then painted (Griff really enjoyed this). I made the roof removable so it would be easier to get things in and out. I added some twigs to reinforce the roof and walls, and we glued flowers all over it. It looks like it comes from the mystical forests of AC Mooreia, where the magical Aleene’s Tacky Glue Trees drip their sap on passersby. 😉

Here you can see that Griff has given the baby gnome (aka Frosty Snow Gnomey) a Thomas to play with.

One of my favorite things is to watch Griff combine disparate sets of toys to come up with different scenarios. Pretty quickly he decided that the gnome house needed to be on the Lego grass, and they needed a fire hydrant and fire truck.

Orange Gnome (Griff’s favorite “because he’s taller than all his friends”) runs the gnome crane in the back yard (which is needed “because they don’t have arms to lift things”).

Blue Gnome “likes to drive fire trucks”.

Purple Gnome likes to take Frosty Snow Gnomey on tractor rides.

The gnomes also kicked all the Vikings out of the Viking longship and went on a joyride with a plastic plant.

I’ve started some broccoli inside and they’re coming along ok so far. I’m planning to direct-seed the first round of spinach, lettuce, mizuna and carrots once the beds dry out a bit during the warmer weather next week.

That’s all for now.

Comments: Comments Off on Picking up where I left off….

It’s FALL!!!!

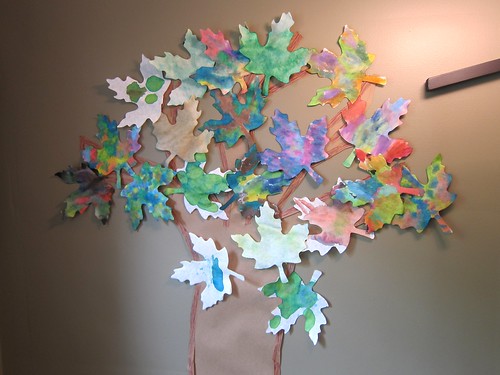
Ah, Fall, my favorite season. (Aside from Spring.) We’ve jumped headlong into the whole autumn crafts thing. We still had some of the die-cut watercolor paper leaves from last year (available here), so we spread those suckers out on the dining room table and painted them up. Griff is still not really into painting/coloring, but he is fascinated by color blending and spent the entire time mixing blue and yellow to make green leaves.
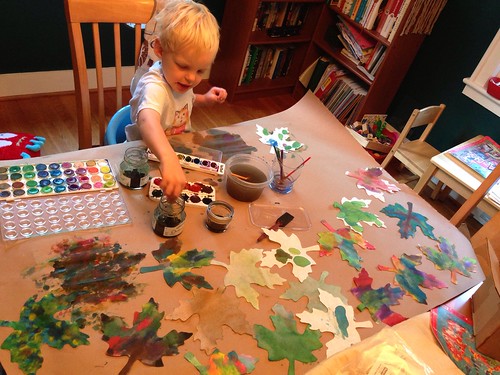
Painting leaves

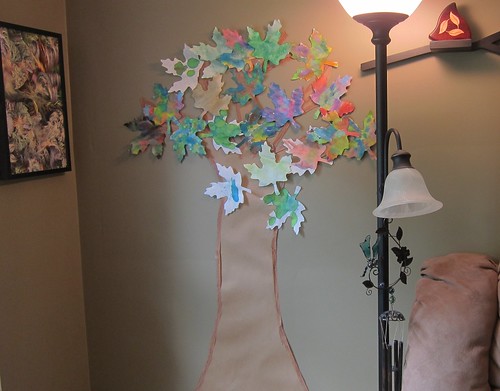
To display the leaves, I took an idea from The Artful Parent’s Autumn Crafts ebook, which I bought last year (definitely worth the money IMO). I bought a huge roll of brown contractor/builder paper at the Home Despot for about $10 (this stuff is extremely useful for all sorts of projects) and cut out a tree shape with branches. I initially taped it onto the wall with some weak, cheapo woodgrain washi tape, but the tree was too heavy, so I stuck a bunch of masking tape onto the back of the trunk and branches and that helped a lot. Griff got to climb up on the stepladder and stick all the leaves onto the tree, which thrilled him.
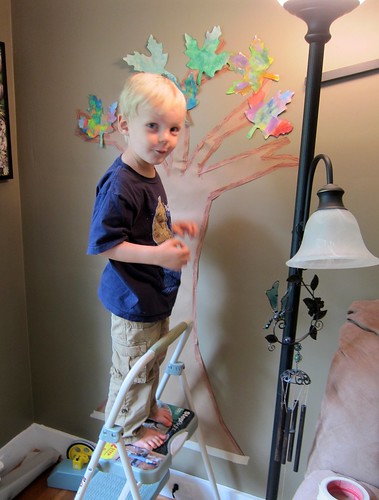
Yay stepladder

Autumn wall tree

Autumn tree

We also tried a project with leaves made from coffee filters with glue-gunned-on veins (from here). The couple we did turned out very nicely, but Griff’s limited patience for painting was about gone, so I’ll probably end up finishing them myself.
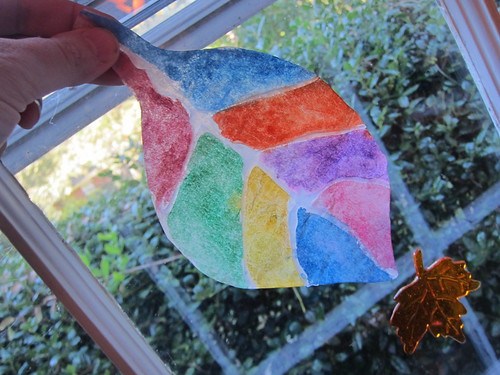
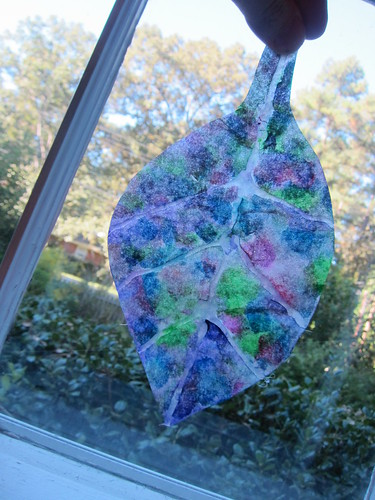
Coffee filter leaves

IMG_2099

We also made a pretty kickass scarecrow. Materials were an 8-foot plastic tomato stake, a thick 3′ dowel rod for the arms, some spare cheap yarn to tie everything together (plus duct tape to reinforce), a $6 bale of straw from Joanns, a thrifted shirt, an old pair of jeans, and some burlap for the head (face drawn on with a Sharpie). We added some old garden gloves and one of Sean’s old hats. Sean came home a little early from work as I was starting to put everything together, which worked out great because it was much easier as a 2-adult job. Of course, every time I look out the window or walk outside I do a double take because there’s this vaguely Sean-shaped figure standing out there and I know Sean is not supposed to be in the yard during the day.
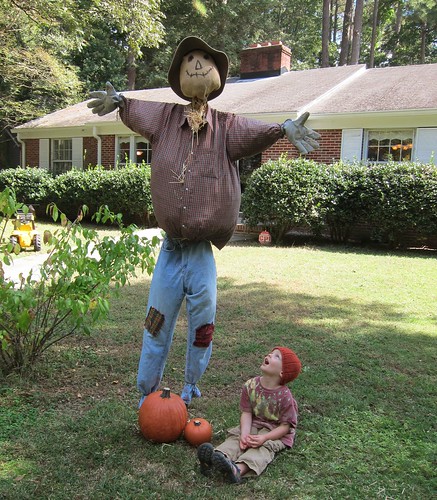
scarecrowpunkin

I’ve done a bit more sewing for Griff (sadly it’s been too warm for him to wear any of it but the jammies).

I recently discovered a line of kids’ knit fabrics made by a European company (German, I think) called Lillestoff. This stuff is EXPENSIVE. Like, $25/meter expensive. It’s certified organic and very high quality, but even Spoonflower organic cotton interlock knit fabric is cheaper than that with a designer discount. On the other hand, the Lillestoff graphics are mind-bogglingly cute, and it’s very hard to find knit fabrics with great kids’ prints. I did a few weeks of stalking web sites for the best prices and finally found an Etsy seller in Canada who had the fabrics on sale by the half-meter at around $10.50. Knits come in 55-60″ widths, so even an approximately 20″ piece of fabric is still plenty useful. Unfortunately, I didn’t account for the shrinkage (and cotton knits shrink a ton), so I ended up with fabric that was a few inches shorter than it needed to be to make up the full length of a shirt for Griff.

I solved this problem in two ways: by colorblocking one shirt, and by adding ribbing to the bottom of the other. They both came out well (IMO).

Here’s the Viking shirt, with bottom ribbing. Seriously, I could not resist these Vikings.
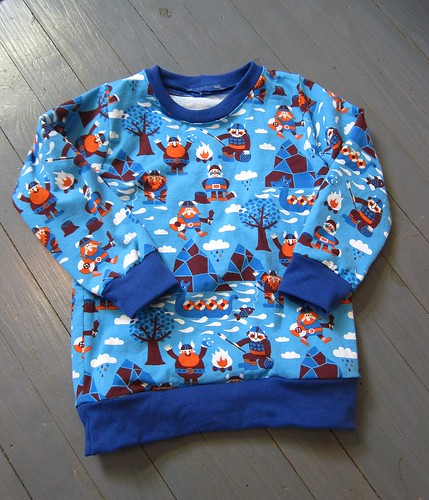
Viking shirt

For the fireman shirt, I colorblocked at the top with blue interlock from Joanns. The blue does not match in either case, but there was no way I was going to find a blue solid to exactly match the Lillestoff fabric, so I went with something that seemed to harmonize well.
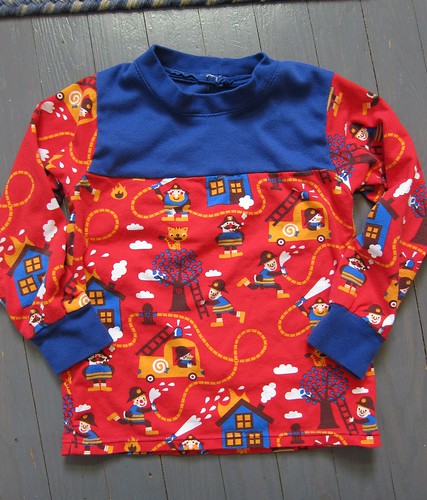
Fireman shirt

Viking shirt with model. I asked him to please hold his arms down and be still for a second, hence the robotic pose here. Holding still does not come naturally to Griff.
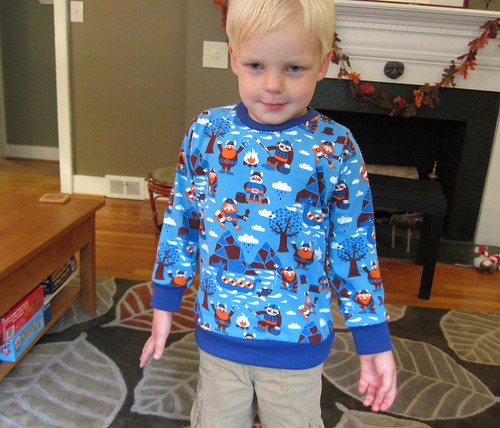
Viking shirt

And the fireman shirt. I love that one of the firemen is smoking a pipe. Would you see that on a kids’ fabric in the US? Heck no.
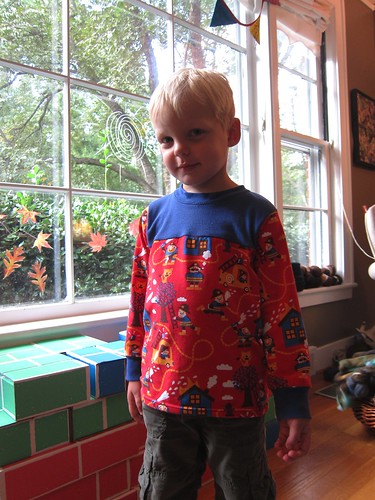
Fireman shirt

I tried out my double needle for the first time while hemming this shirt. As you can see, there are still some tension issues I need to work out for next time. I was also too darn lazy to wind a bobbin so the thread colors would match. The hem seems stretchy and strong, but we’ll see how it wears.
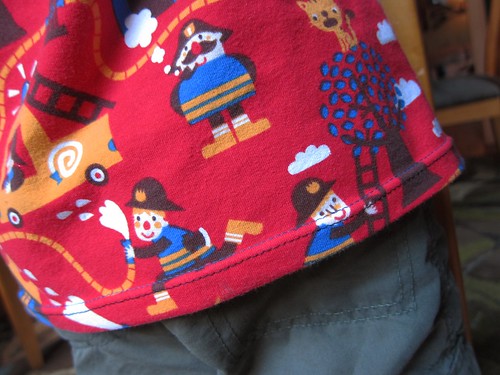
Double needle hem

Since Griff has outgrown most of the pajamas I made him over the summer, I also churned out 4 pairs of knit jammie pants this week and embellished some inexpensive shirts to go with (reverse applique with scraps). I think I’m going to only use knit fabrics for his pajamas in the future, they seem so much more comfy for him than flannel or quilting cotton. The blue and white pinstripe ones were made as an experiment with some on-sale Target jersey pillowcases. Never again, the quality is really crappy compared to the yardage I bought (from Nature’s Fabrics, very recommended for prices, quality and fast service). I have 2 more pairs to make and then I’ll move on to more long-sleeved tees for the winter. (The pajama pants were made using this pattern, also recommended.)
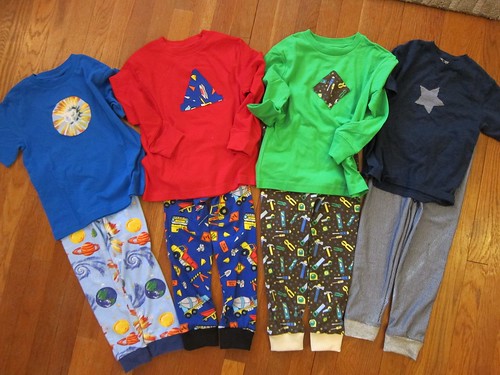
jammies2

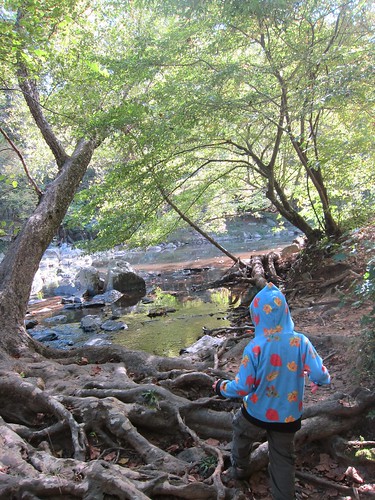
It’s been cool enough lately to go for long hikes/walks again, so we went out to the Cole Mill section of Eno River State Park last weekend. Griff is very into climbing now, and he’s pretty amazingly surefooted. I’m really glad he hit this phase at 3.5 instead of as a young toddler who wanted to climb bookshelves and tables.

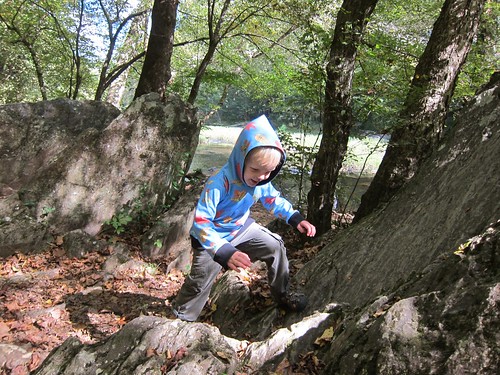
Wood elf

Rock climbing

Heading to the river

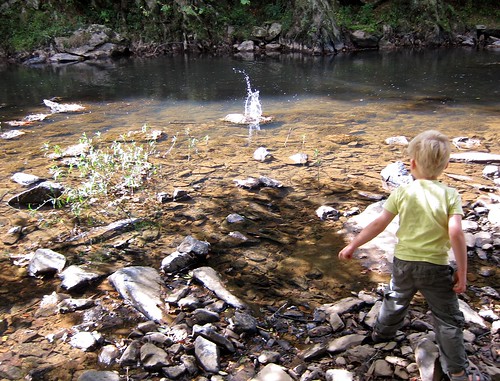
Many rocks were flung into the depths of the Eno. This is apparently fun for hours.
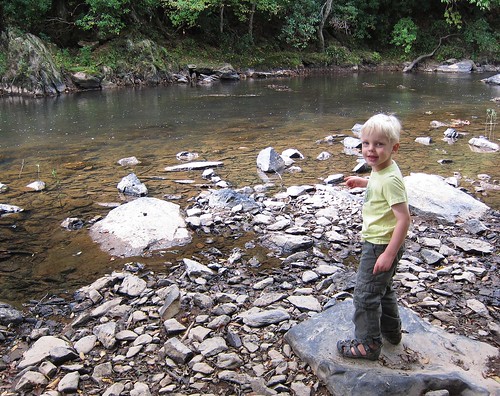
Rock flinging

Rock flinging

Eno River, September

On our walk, we saw a tree with a hollow that looks just like a fairy door!
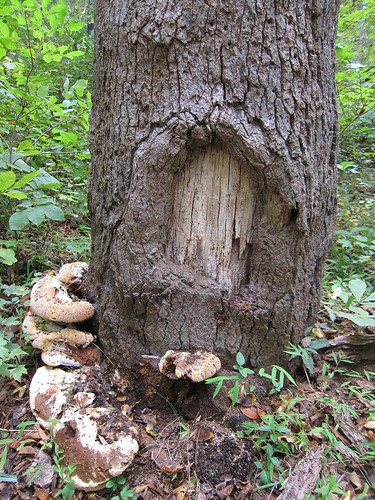
Fairy door!

I am highly tempted to buy a little doorknob and go back to stick it on, but I’ll content myself with this instead.
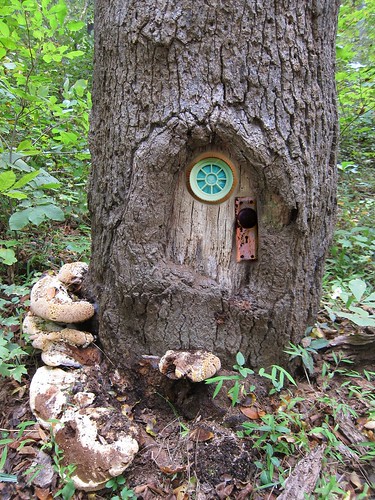
Fairy door tricked out

We also saw some huge turtles sunning themselves on a log. This guy was easily the size of a serving platter. (This was as good a shot as I could get through the trees and with max zoom.)
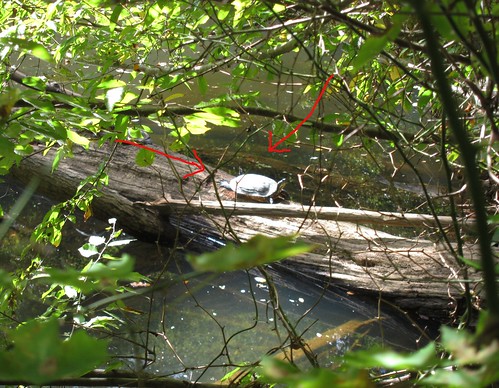
Big turtle

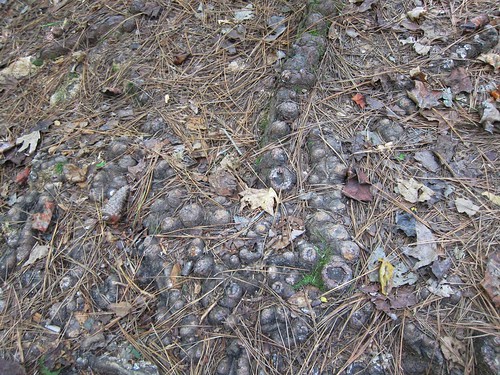
I also love the octopus-tentacle-resembling roots of pine trees.
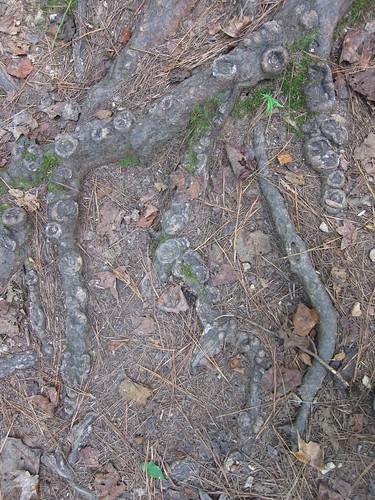
Tentacular roots

Tentacular roots

I entered my third Spoonflower fabric design contest this week (theme: constellations). On my first attempt, I placed in the top 87%. I moved up to the top 58% on my second. This time I managed to crack the Top 100: 95 out of 211! I am totally thrilled. The contests are really basically meaningless unless you make the top 10 (in which case your design can automatically be sold without your having to pay for printing a swatch. Sometimes the top 10 are offered as part of a fat quarter bundle as well.) But considering that I do this stuff on a whim and slap things together at random with watercolor pencils, a scanner and GIMP instead of using Photoshop, Illustrator and actual talent, I’m pretty darn happy. I have a yard of the constellation fabric on order and Griff will be getting a shirt made from it.

Constellation Construction

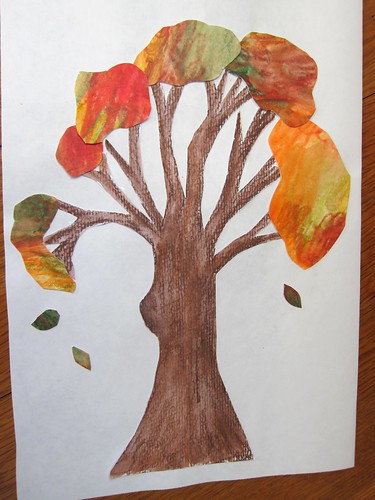
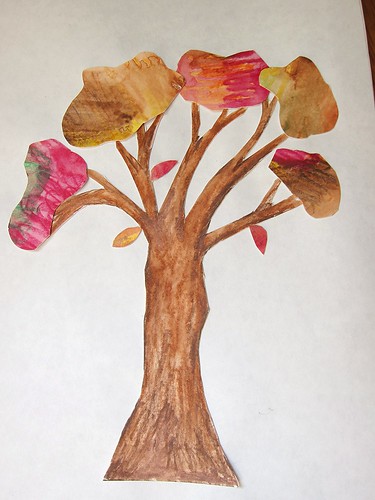
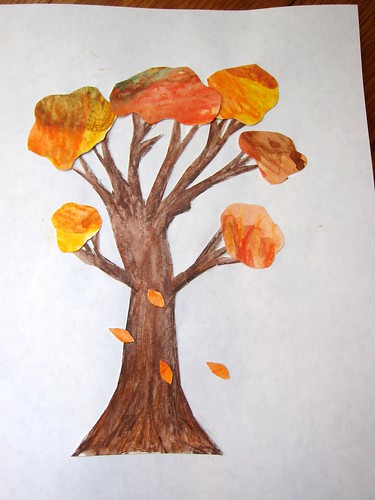
I’m still experimenting with various ways to use my watercolor pencils. One project that I thought turned out pretty well was this collage-type thing. I drew, colored and water-washed some tree trunks and branches, cut them out and glued them to some of Griff’s plain art paper (I regret not gluing them to watercolor paper on which I’d already done some ki kind of blue wash for a sky, but I’ll try that next). Then I randomly watercolor-penciled 2 sheets of watercolor paper in various fall shades, gave them a water wash, and cut out various foliage-y shapes and individual leaves and glued those on.

In progress photo:
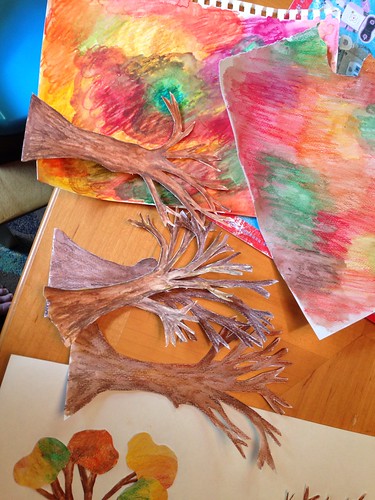
Collage trees in progress

Some finished trees:

Collage tree

Collage tree

Collage tree

I scanned in the trees, along with some extra leaves and a couple squirrels I created the same way, manipulated the images in GIMP, and made a fall fabric image. I ordered it on cotton sateen and I’m planning to make a tablecloth, pillows, or some similar home dec item with it once it comes in.

Autumn Forest

And finally, this is THE END.
Comments: Comments Off on It’s FALL!!!!

Lots of sewing

After a lengthy spinning and knitting period, I’m back into a sewing mood. I’ve been working out the kinks in the whole sewing-knit-fabrics-without-a-serger thing, and after several wears and washes of projects with no popped seams, I think I finally have it nailed down. The tricks I’ve learned so far:
  1. Always use a ballpoint or jersey needle when sewing knits.
  2. Always use a walking foot with knits. Actually, always use a walking foot for everything except, like, zippers and buttonholes, because a walking foot is freaking awesome.
  3. Use woolly nylon in the bobbin. This makes a HUGE difference, especially for seams that get a lot of abuse, like necklines that get jerked over a 3-year-old’s giant noggin. Woolly nylon is available by the cone at Amazon for pretty cheap, and it comes in lots of colors. Some people hand-wind it onto their bobbins to avoid stretching it, but ain’t nobody got time for that. I just skip my machine’s tension disk by sticking the woolly nylon cone on a knitting needle and then let the machine auto-wind the bobbin while I hold the cone on the knitting needle and pretend I’m the Statue of Liberty.
  4. Use your machine’s stretch stitch (looks like a modified zigzag or lightning bolt, or on my Bernina, like a mountain range) for sewing seams. Once you find this stitch, take several scraps of knit fabric and play with the length and width of the stitches, then stretch the living crap out of your samples and try to pop/break the stitches. Experiment until you find the stitch length/width combo that survives the most abuse. Then WRITE THOSE NUMBERS DOWN on some masking tape and stick the tape to your machine.

One thing I have not yet tried is using a twin ballpoint needle for hemming (it just arrived last week from Amazon; Joann doesn’t carry ballpoint twins, oy). My previous projects have either been finished with ribbing or I’ve used woolly nylon and a basic zigzag for the hems (which works fine, it just doesn’t look like a commercial hem). A twin needle fits into a regular sewing machine and gives similar results to a coverstitch machine, with two lines of straight stitching on the front and stretchy ziggy interlocked threads on the back. If you look at the commercial t-shirts you own, most will be hemmed this way. I’ll be trying the twin needle soon and will report back on how that works out.

If you’re still reading at this point, here are some pictures of recent projects.

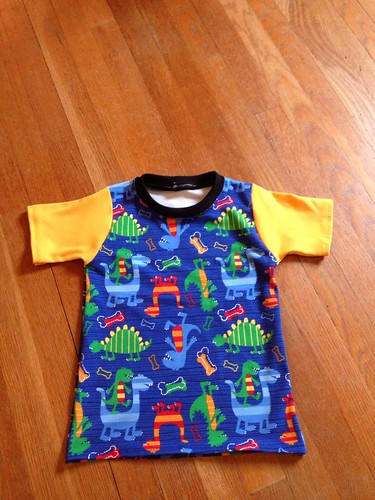
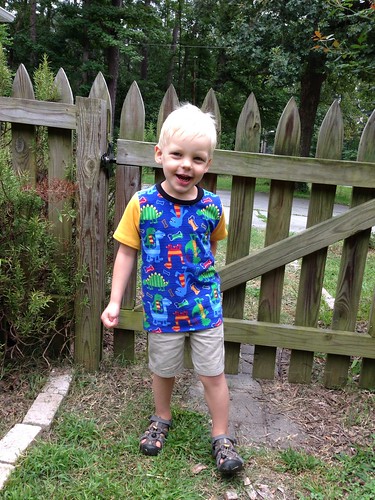
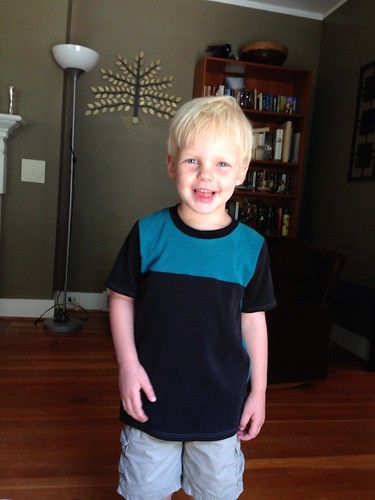
This was made from the Fishsticks Charlie Tee pattern. The dino fabric is Michael Miller cotton jersey from fabric.com (very nice quality), and the yellow fabric is from a shirt I thrifted specifically for the project and cut up. (The nice thing about Goodwill is that they sort their t-shirts by color, so it’s easy to shop for the colors you need). The black rib knit is from Joann’s. Joann’s has some nice basic cotton knits, but their color selection kind of sucks.

Untitled

I am the luckiest woman in the world because Griff loves the knit shirts I sew for him. I am enjoying this while it lasts.

Untitled

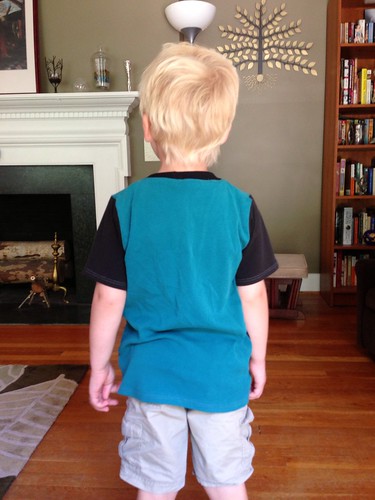
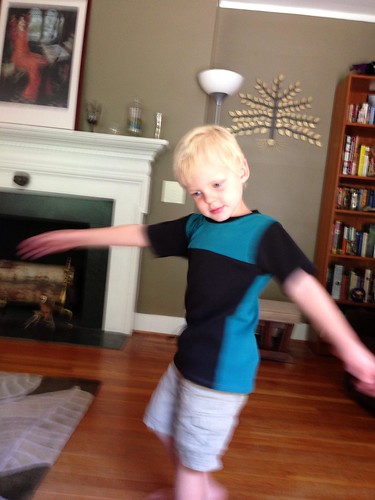
Here’s another shirt; this one I made from old discarded t-shirts of mine that I was planning to use for some craft project or other. I had to color-block because one of the old shirts had some staining, but it worked out well. Yay for recycling (and free fabric).

The front:

Another up/re-cycled tee for Griff

The back:

Back of Griff's shirt

The sideways:

Griff shirt, showing the colorblocking

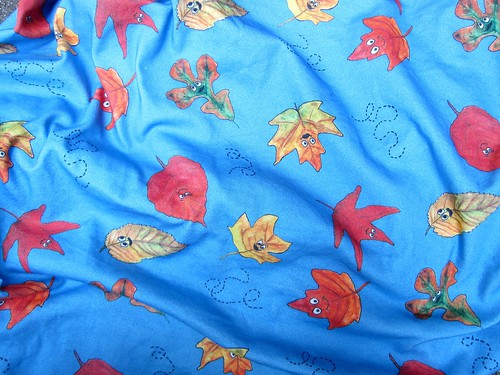
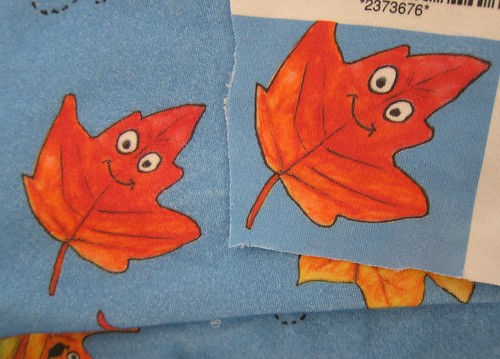
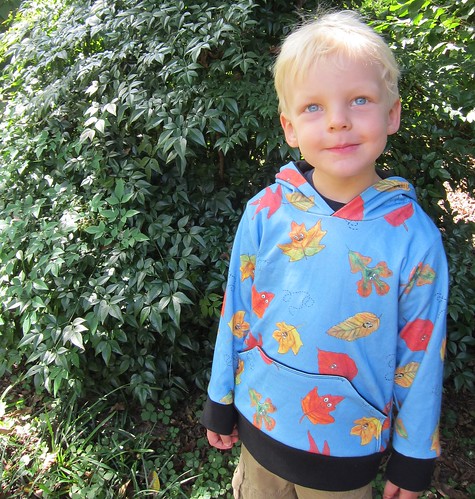
This next one is a very special project because it’s made from fabric I designed and had printed at Spoonflower. I used leaves from the yard as models, colored them with watercolor pencils, gave them a water wash, outlined/detailed with black ink, scanned the paintings, modified them in GIMP, and designed and uploaded the fabric image. I had a yard of the Spoonflower organic interlock knit printed and was totally thrilled with the results. The fabric is extremely soft and dense, and a good medium weight.

Tumbling Leaves

Spoonflower fabrics have a bad rep for fading in the wash because they’re basically printed with inkjet technology, not dyed. I washed the fabric before I cut it up, and I snipped off a sample to compare before and after.

leaf-beforeafter

As you can see, the background is faded/heathered after washing, kind of like denim. The leaf color is a little lighter, but not a huge amount. I like the heathering effect, but this is something to consider when ordering Spoonflower fabrics. Some of their fabrics seem more colorfast than others. There’s also a good amount of shrinkage, but no more than I would expect from a cotton knit (Spoonflower lists estimated shrinkage as 7% in length and 6% in width for this fabric).

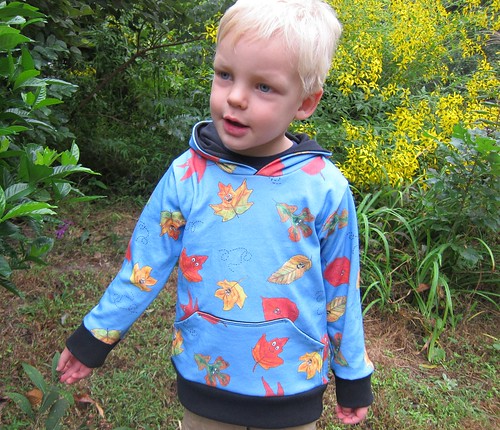
And here’s the finished product. This is the Charlie Tee again, using the hoodie pullover variation. I used black cotton interlock from Joann’s for the hood and pocket lining, and black cotton rib knit for the cuffs/waistband.

jacket2

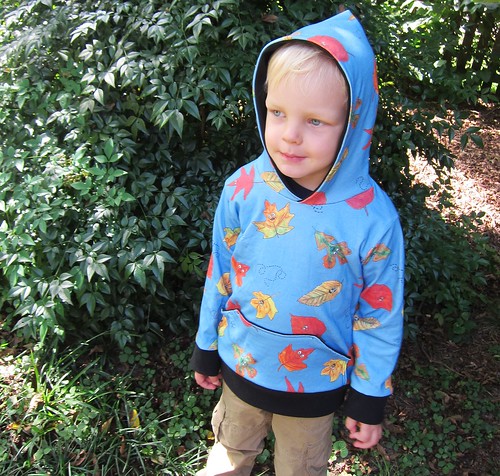
And with the hood:

jacket5

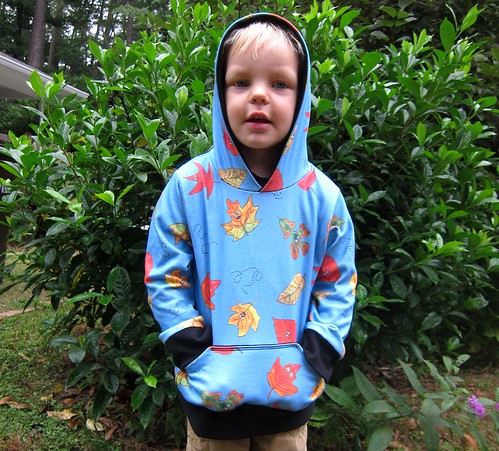
And using the pocket:

jacket4

And because I think my son is adorable:

jacket7

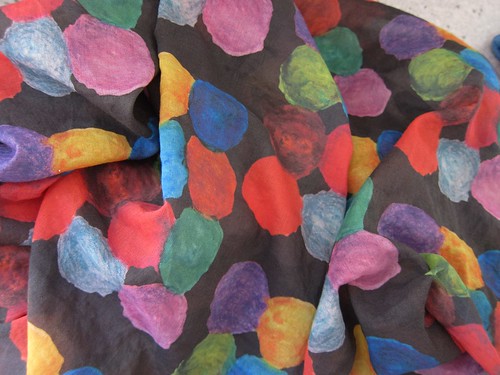
I also sewed a little something for me. This is another fabric I designed and had printed at Spoonflower, this time using their cotton voile. This was done with watercolor pencils again.

Color circles

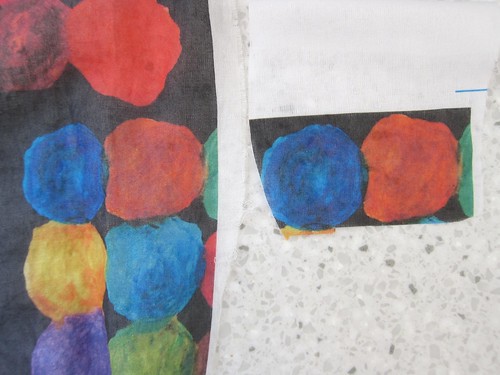
Here’s a before and after washing photo for this fabric. The voile is supposed to only be hand-washed or dry cleaned, but HAHAHAHA, NO. I threw it into the washer and dryer. A little fading, but again, not bad at all.

circlesbeforeandafter

The voile is not as soft and drapey as I expected. It’s not exactly stiff, but it has a decent amount of body. So if you, say, make a scarf and want it to stand up a bit and stay fluffed up where you fluffed it, it’s a good choice. I think their silk might be a better choice if I do this again.

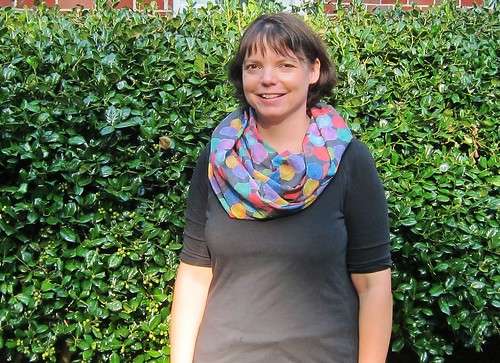
I used this infinity scarf tutorial to make a double-looped scarf. I modified it by making the strips 11″-12″ wide. To maximize the yardage, I cut three strips, then cut one in half and sewed those to the other two. You really can’t tell that it was pieced.

Color Circles infinity scarf

The End

Comments: Comments Off on Lots of sewing

Three Bears, Oh My!

This weekend we headed out to Three Bears Acres near Creedmoor for a fun parent/kid play date with some folks from the daycare Griff used to attend. I had read many good reviews of this place, but we’d never managed to get out there previously, so we packed a lunch (they have a very limited concession stand and there’s nowhere to eat nearby) and off we went.

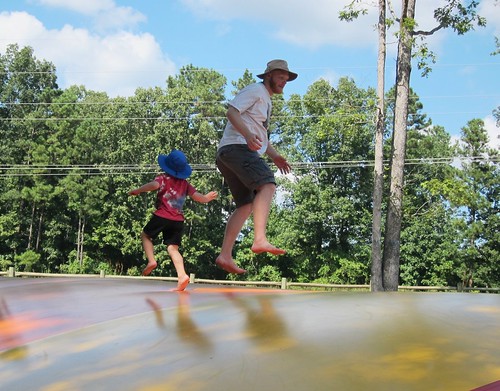
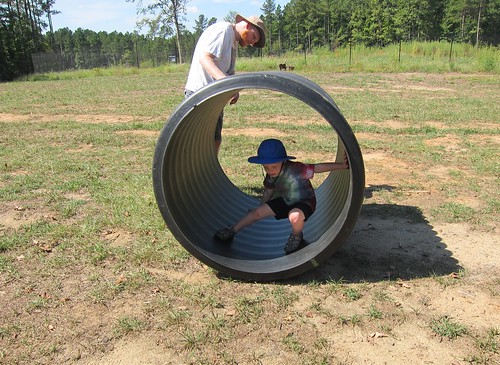
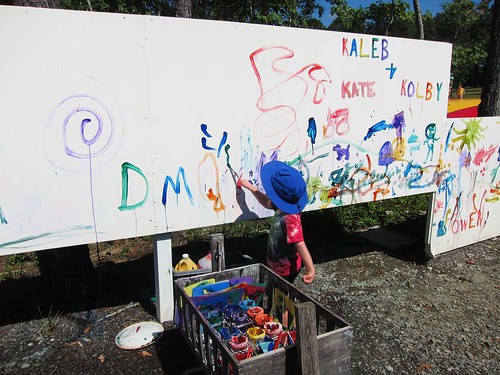
To be honest, we were a little underwhelmed when we first arrived. The area near the entrance is a big scrubby field with a giant inflatable bouncy pillow (this was a huge hit with both the kids and adults) and a smattering of other stations, including a sand box, a mud kitchen, a grafitti wall, an archery/slingshot area, and a field where kids can climb into giant PVC drainpipes and roll around.

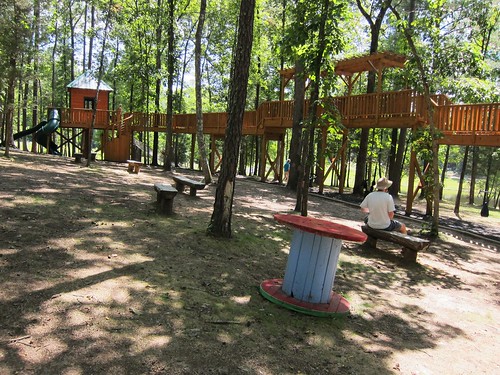
Once we explored a little further, though, we were seriously impressed. Back in the (lovely, cool, shady) woods is a giant 4-lane slide that you can sled down (so fun!), a big pond with pedal boats, a water play area (which we skipped), and an enormous play structure with swings, slides, and playhouses. There are large picnic tables right in the center of all this where you can plop your stuff down and wander back for snacks whenever folks are hungry. We had no trouble staying busy from around 10:30am to well past 4pm, and the kids didn’t want to leave even then! The staff were all really sweet, as well.

Here are some photos from our day there. I really can’t recommend it enough for a day of flat-out, full-tilt outside fun (and it’s just as enjoyable for the adults as the kids).

3bears6

3bears4

3bears3

3bears5

3bears2

3bears11

3bears9

3bears8

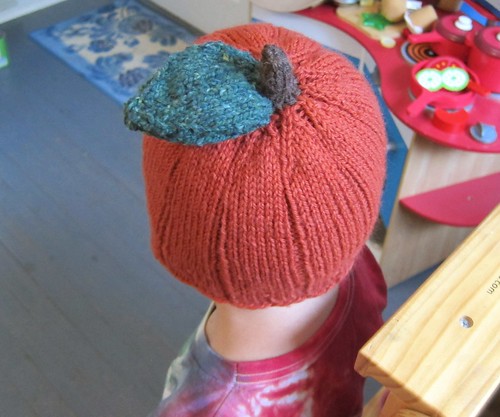
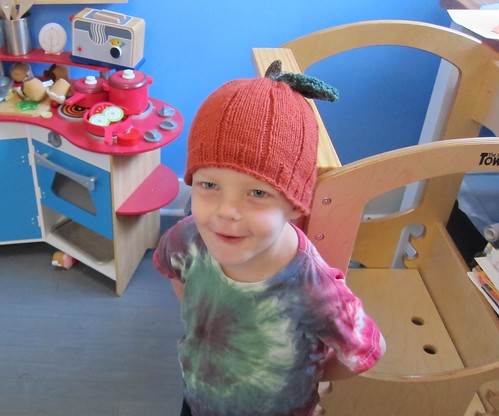
I’ve been working on getting into a fall/autumn mindset to gear up on cold-weather knitting projects (the recent spate of 90-degree weather isn’t helping, though). I decided to start with something quick and fun: a pumpkin hat for Griff. I’ve been meaning to make him one of these for years. I told him about my plan, and he was totally enthused, to the point that he sat next to me on the couch watching me finish knitting the stem, wore his new hat around the house all Friday evening, and reminded me before bed on Friday night that I needed to keep knitting the leaf for the top.

I know in a few years he’ll probably consider anything I make for him to be lame beyond belief, so I really cherish this time. There’s no better payoff to any kind of handcrafter than having someone be completely thrilled with something you’ve made for them.

hat2

hat3

Comments: Comments Off on Three Bears, Oh My!

Take me to the river

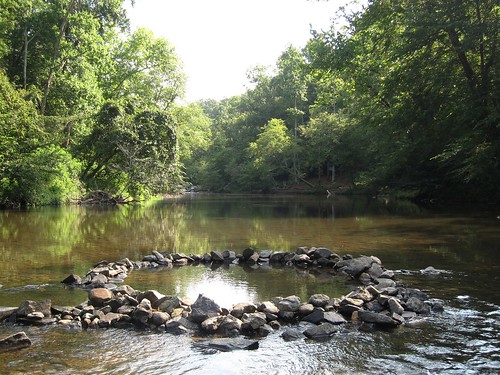
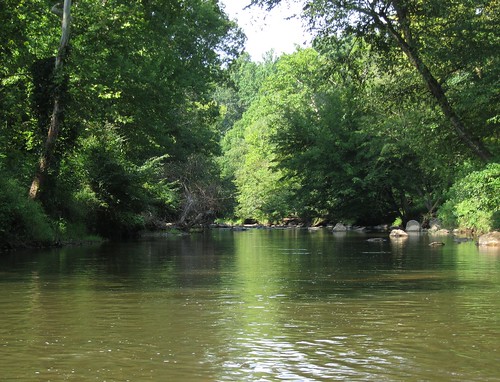
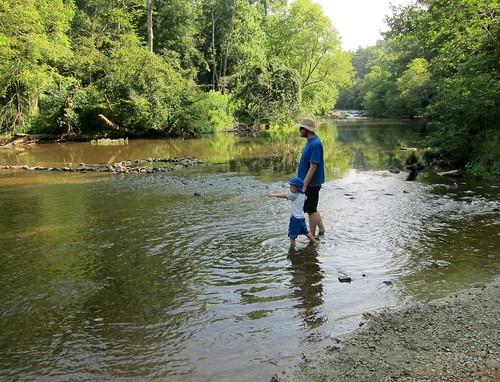
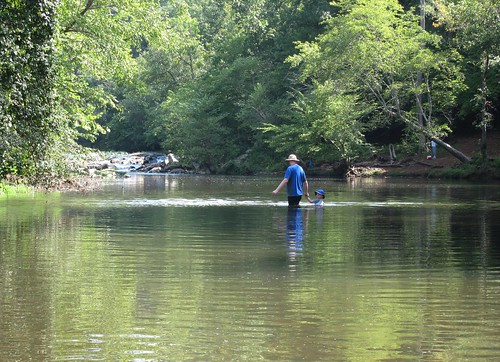
It being eleventy billion degrees outside, and having nearly expired from heat stroke at the Farmers Market, we decided to jump into the Eno River this morning. We almost didn’t go because we assumed everyone else in Durham and Hillsborough would have had the same idea (being that the Eno is free, refreshing to jump into, and a mere 20 minutes from either downtown), but no, we pretty much had the river to ourselves except for a few kids who stopped in briefly to splash around.

I retained my unbroken record of not falling into the water and drowning the camera, so go me! (This is tougher than it sounds, because the river bottom is covered in smooth slimy rocks that move around a lot.)

It was such a gorgeous morning, despite the heat.

Eno River State Park

Eno River State Park

The first few times we came here, we had to coax Griff into the river. Nowadays he drags us into the water and tries to go out over his head. No fear. Very scary for his parents.

Eno River State Park

Eno River State Park

Eno River State Park

Eno River State Park

Eno River State Park

Eno River State Park

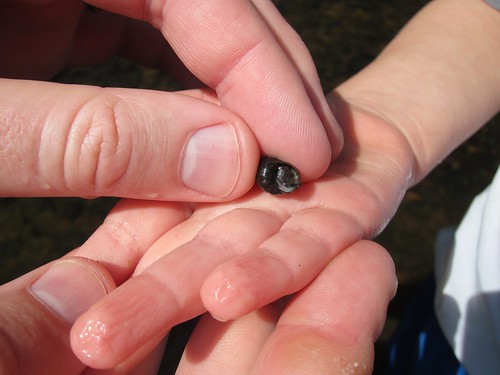
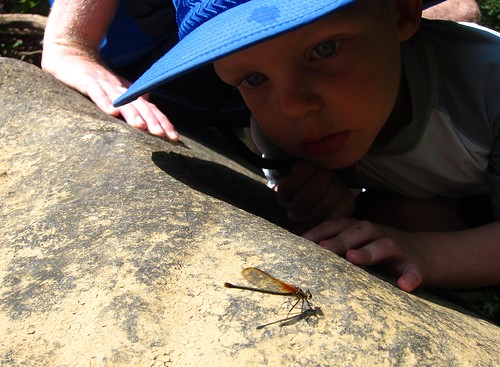
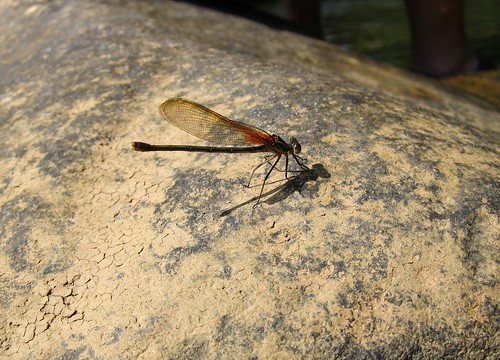
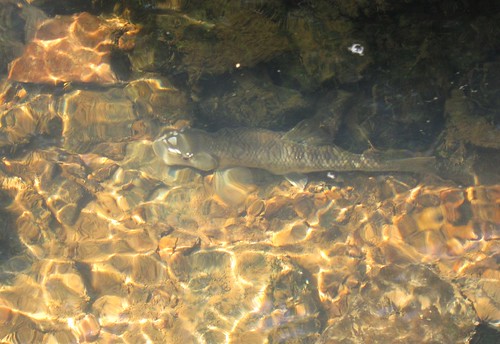
We saw lots of cool stuff today. Snails, bugs (lots of damselflies), fish (all pictured below), along with a bunch of butterflies and a sunning turtle.

Eno River State Park

Eno River State Park

Eno River State Park

Eno River State Park

Plus lots of plain old pretty.

Eno River State Park

Eno River State Park

Eno River State Park

Eno River State Park

On a totally different topic, I finally took the plunge into sewing knit fabrics today. If you don’t sew, you probably have no idea of the scary reputation knits have, but plenty of otherwise very experienced sewists won’t touch them. Over 50% of Griff’s wardrobe consists of knits (t-shirts, stretchy pajamas, etc), and I can only make him so many quilting cotton shorts and flannel jammie pants, so I figured it was time to jump in.

My first project (Fishsticks Designs’ Charlie Tee) was a t-shirt for Griff made from an old unwearable shirt of mine that I cut up, so I wouldn’t be upset about wasting “good” fabric if I screwed up royally. (I used new fabric for the neckline ribbing.) I have to say, it went way better than I expected. I still have some issues to work out with the neckline (Griff has a huge head, he puts on shirts rather violently, and he’s so far managed to pop out a few stitches on all the variations on the neckline hem I’ve tried so far) but otherwise, I’m very excited and pleased that it looks like an actual t-shirt! After re-reading my machine’s manual and chatting with other folks sewing this pattern, I have some new tricks to try tomorrow.

New t-shirt for Griff

Neckline closeup!

Comments: Comments Off on Take me to the river

Tour de Fleece 2013

Well, I failed miserably at my Tour de Fleece goal this year (ie, to spin for at least 15 minutes every day of the tour), but I did get more spinning done than I expected to.

I finished spinning and plying the 6 ounces of Corriedale/Nylon Cupcake Fiber Co batts and I’m very pleased with the resulting yarn. It’s probably a DK weight and is a true 3-ply. Not sure what this will end up as yet.

3-ply Handspun

I also started spinning the braid of Bluefaced Leicester that I had dyed years ago and which had been in my stash forever (Griff chose that one over the green and brown superwash Merino I had also picked out). The fiber was very compressed from being in storage and stuffed into various moving boxes, but it fluffed up nicely and is spinning up well, all nice and shiny and BFL-y.

Spinning BFL

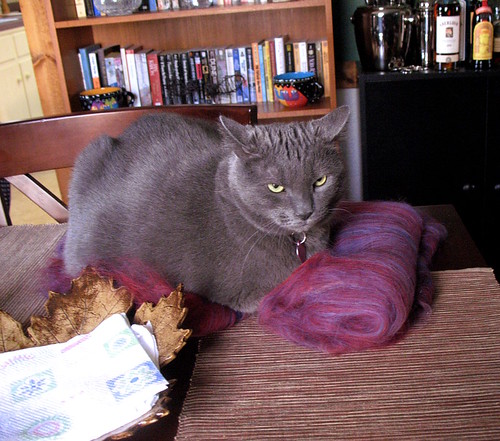
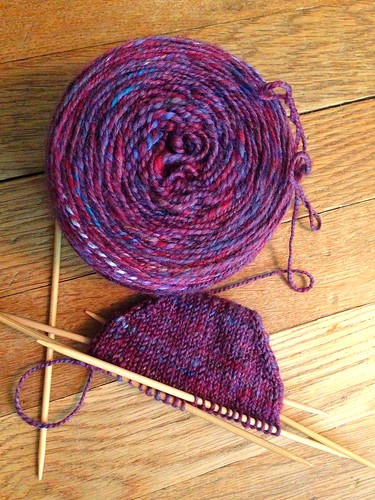
Once I finished the toe-up handspun socks I had been working on, I immediately cast on another pair with some more stashed handspun. This yarn was spun several years ago from a batt that Michelle carded for me. I seem to recall that she added some bamboo to the mix with the thought that it would make a nice strong sock yarn. Here’s a photo of the batt, with naughty Shastes using it as a pillow (RIP, little Shastes).

Bad bad kitty

And here’s the progress so far.

Another handspun toe-up sock

Comments: Comments Off on Tour de Fleece 2013

Rock me mama like a wagon wheel

Apparently roasted tomato sauce is A Thing. A friend told me about it, and then I did some googling and found that pretty much every food blogger on the planet has a recipe for it. We have been lucky enough to be glutted with brandywine and cherry tomatoes so far this summer, and even with BLTs on the menu and Griff uncomplainingly consuming a dozen or more cherry maters a day, our windowsill has been filled with overripening red and orange and yellow fruits. Though I was dubious at the idea of making good sauce with salad tomatoes, I gave it a try.

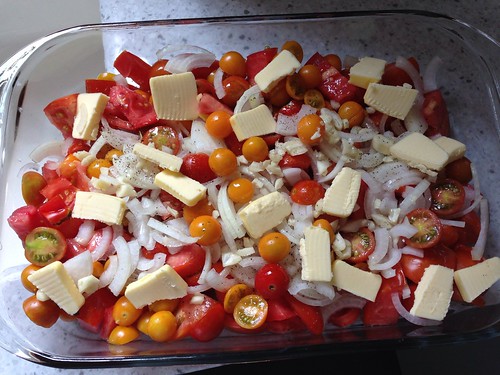
In a 9×13 pan, 3.5 pounds of chopped brandywines and halved cherries, a sliced onion, several chopped garlic cloves and a half stick of butter (inspired by this blog post).

Untitled

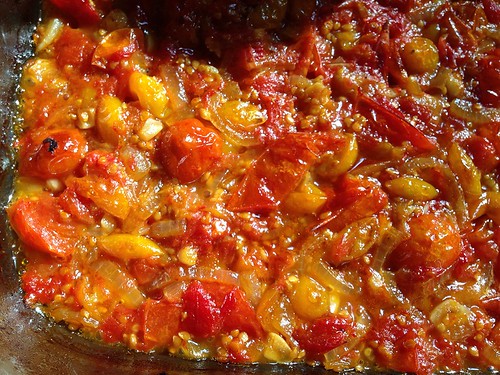
I baked it all at 350 for about an hour and a half, got impatient because I had a pan of focaccia that also needed a turn in the oven, turned the temp up to 400 and let it bake another 30 minutes. At that point, we had this. Completely soft, just barely starting to turn black at the edges, and most of the liquid gone.

Roasted tomatoes

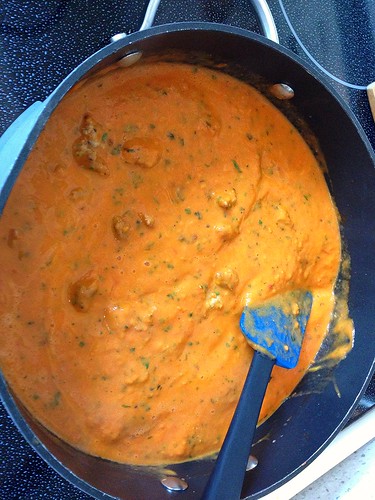
Most of the recipes I had read warned that the sauce would be watery, but after putting the contents of the pan through the blender (along with a handful of fresh basil, oregano and rosemary) it was so thick that I had to add water. I combined it with some crumbled, cooked Italian sausage and was unable to resist adding a splash of half and half. Due to this addition and the fact that a good portion of the tomatoes were yellow, the sauce was a creamy orange color.

Roasted tomato sauce

It was so. good. Really, really intense tomato flavor. The trip through the blender took care of the skins and seeds completely, and the sauce was smooth and creamy due to the butter and half and half.

We served it over wagon wheel pasta because, well, we have a three-year-old who is amused by such things. It was awesome.

Omnomnom

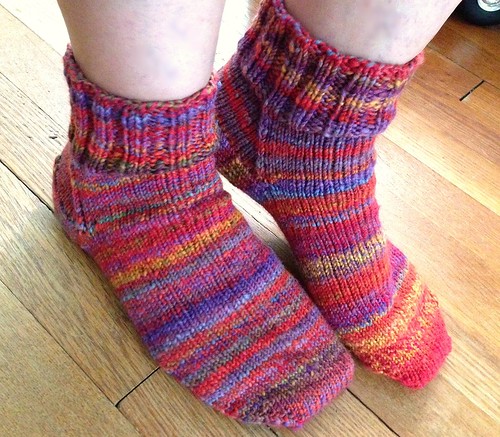
I also finished my first pair of toe-up socks today, in some 2-ply worsted weight handspun that’s at least a year older than Griff. Wool socks are about the last thing I need this time of year, but I was happy to use up the stash yarn and I’m looking forward to wearing them in November. I’m on a mission to start using up some of my older handspun. Most of it’s in approximately 4oz batches, and socks seem like a logical choice for most of it since I like to ply on the tight side and there’s nothing better than handspun socks.

Handspun socks

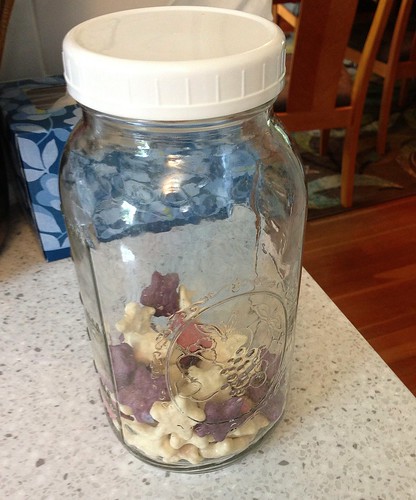
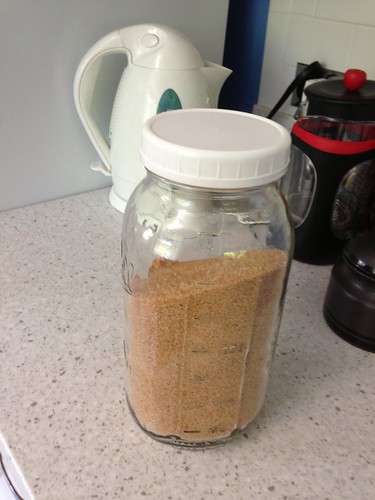
While I’m babbling incoherently after 2 glasses of wine at dinner, everyone should buy a 6-pack of half gallon canning jars and a pack of plastic lids. Although they are too big to be safely used for canning anything but juices, they are incredibly useful around the house. I bought them for making iced tea, but we are also using them for storing various stuff like demerara sugar (which we sometimes buy from bulk bins and then just dump into the jar) and Griff’s Trader Joe’s star cookies, which can be used to bribe him to do just about anything.

Cookie jar

Sugar jar

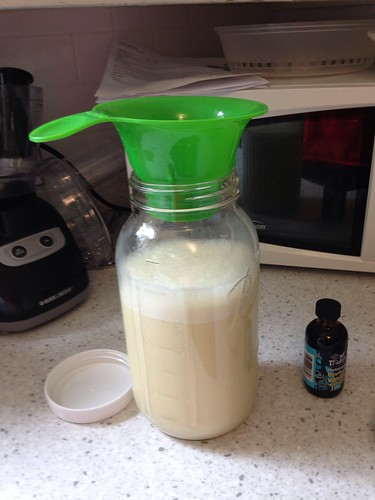
Also, they’re perfect for, say, chilling a custard ice cream base that has to be cooked and then cooled. And canning funnels work perfectly with them because they’re canning jars.

Untitled

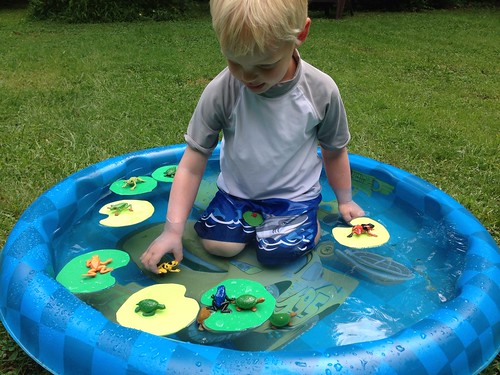
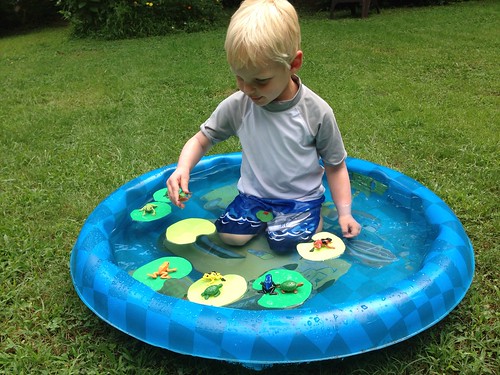
Lastly, here’s something I did to spice up Griff’s wading pool. We bought some sheets of craft foam and a Toobz of frogs and turtles at the craft store (yay 50% off coupon). I cut out lily pads and voila, instant pond. (I got this idea from a craft blog but can’t remember where.)

Lily pond

Lily pond

I leave you with this thought: the needs of the many outweigh the needs of the few. Or the one.

Trapped

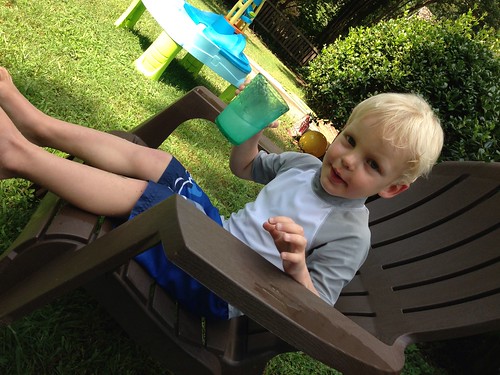
Also, stay thirsty, my friends.

Stone cold chilling

Comments: Comments Off on Rock me mama like a wagon wheel

A month’s worth of blogging in one post

I haven’t updated the blog in quite some time. These days it’s easier to just throw a few pics on Facebook here and there, but sometimes it is nice to collect a bunch of updates in once place so next year when I’m asking, “Were the tomatoes ripe in June?” or “What size were those shorts that I made for Griff?” I can just look here. 🙂

I have been on a little sewing binge lately. I finally decided to drag the sewing machine upstairs into the dining room, and that did wonders for my productivity. (Previously I had been sewing in the basement, which required working only in the evenings or dragging Griff downstairs with me for as long as he would tolerate the limited toy and book selection.)

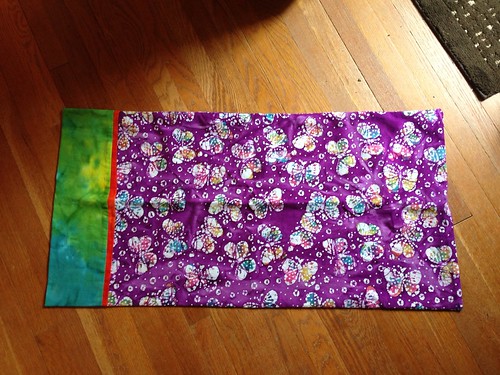
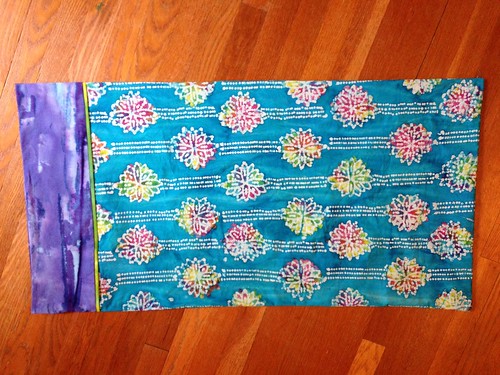
I made two batik king-size pillowcases for my Mom’s birthday (by request). They turned out really well and I’ll definitely make more in the future. I used this handy tutorial, and they were better constructed than most of the commercial pillowcases I own.

Pillowcase for mom

Pillowcase for Mom

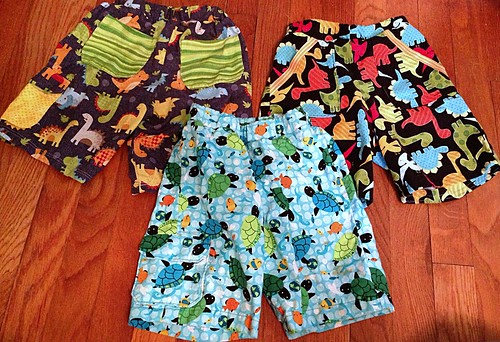
I made three pairs of shorts for Griff using the Fishsticks Designs Inside or Outside Pocket Pants pattern in 4T. This pattern is particularly nice because it allows you to customize with as many or as few pockets as you like: inside or outside front pockets, back pockets, and cargo pockets with flaps. As you can see, I chose a variety of options with these. And unlike button-down shirts (sigh), Griff loves these shorts and is happy to wear them. I will definitely be making more before the summer is over.

Griff shorts

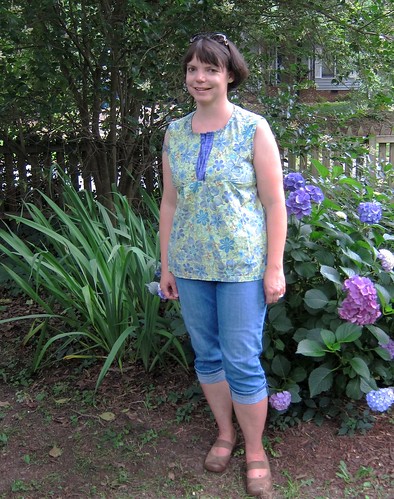
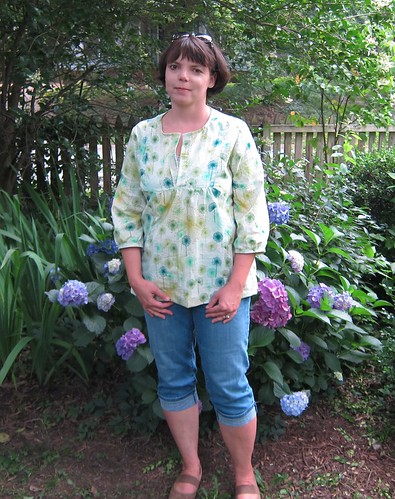
I’ve also done some sewing for ME! I’ve been stalking examples of the Wiksten Tova tunic top for months and decided to go ahead and buy the pattern. Sewing the front inset is a bit tricky, but otherwise it’s a very doable project and I ended up with three very wearable tops. I made the XL and then hemmed it quite a bit shorter than the pattern calls for, and took in some of the extra fabric at the waist.

The first was a sleeveless version out of quilting cotton. I only had 1.5 yards of fabric, so sleeves weren’t happening. There are no instructions for doing a sleeveless version; I winged it by using a bias tape finish. I didn’t like the collar in the pattern, so I did a simple bias tape finish for the neckline on all three tops as well.

Wiksten Tova, sleeveless

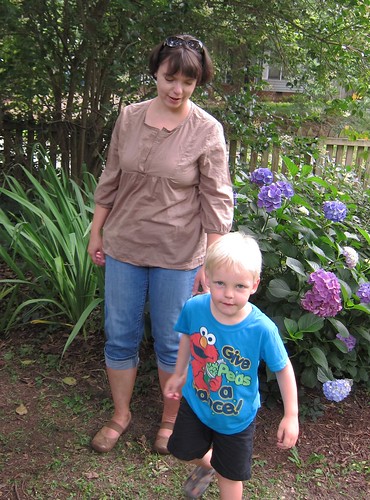
This one is made of 2 yards of 56″ wide cotton voile. At $5.98 a yard, it was a pretty good deal. The voile was a pain in the butt to sew, but it’s very lightweight and comfy. Here I am with my little photobomber.

Wiksten Tova in cotton voile

Last, another quilting weight top (a Valori Wells fabric on sale for $5.98 at fabric.com). A top with sleeves takes 2.5 yards, so this was the most expensive of the bunch, but it’s my favorite. I love this print, it looks like dandelions.

Wiksten Tova in quilt weight cotton

I’ll probably make another sleeveless version for the summer once I find another fabric I really like. A lot of the example projects I’ve seen are made of flannel; I think I’ll be making a couple cozy versions for fall in a few months.

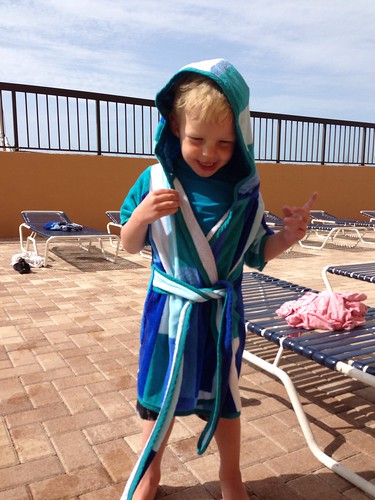
I also made Griff a beach robe from the MADE beach robe pattern. It uses either a large beach towel or terry cloth yardage (we opted for a towel Griff picked out at Target). The pattern only goes to 4T and requires approximately 3,591,295 yards of bias tape to finish the edges (otherwise the terry will shed and fray like crazy) but it turned out well and proved extremely useful on our recent beach trip. Kids really get cold after coming out of the water, and the robe worked much better for warming Griff up and keeping him from dripping everywhere than a towel would have.

Griff's beach robe

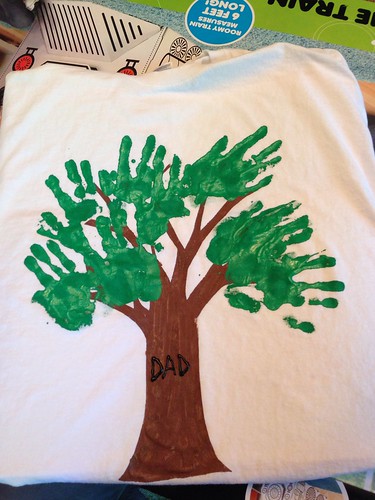
A few other projects include a handprint tree shirt for Sean’s Father’s Day gift from Griff (Griff is always amazingly patient with me when we do these painting projects!).

Handprint leaves

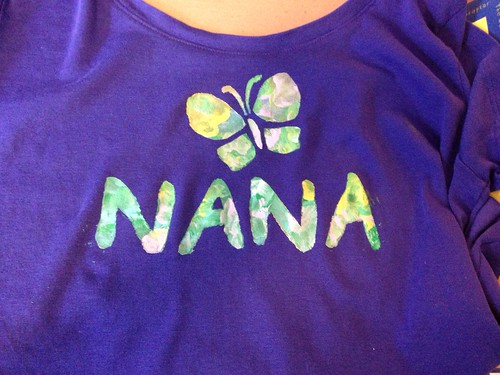
We also made a freezer paper stencil shirt for my mom that Griff painted (a little too vigorously, but it still turned out legible.)

Shirt for Nana

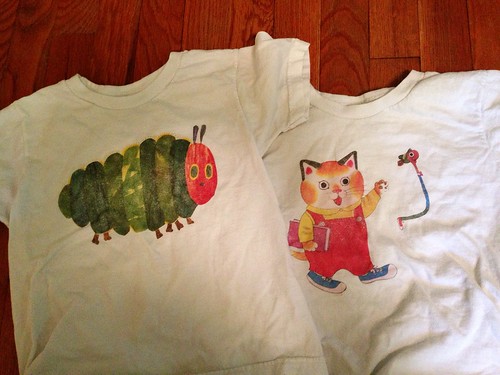
I had some iron-on inkjet transfer sheets that needed to be used up before they started getting old (they stop working well after about 6 months), so I used the scanner to make some copyright-violating shirts for Griff.

Griff shirts

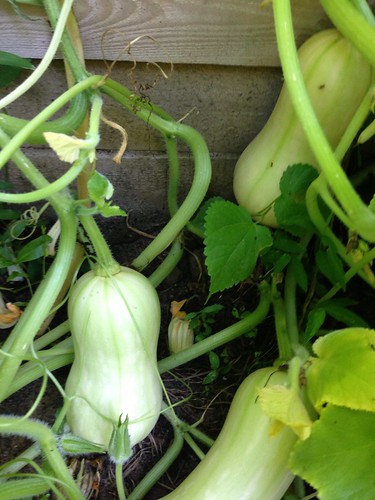
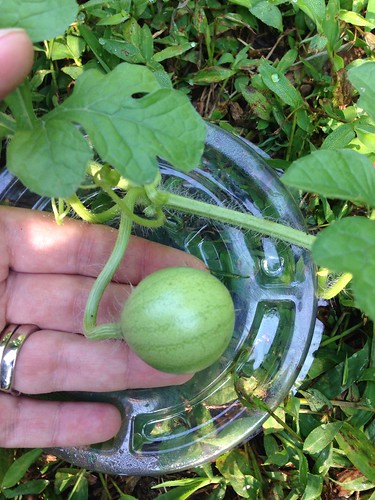
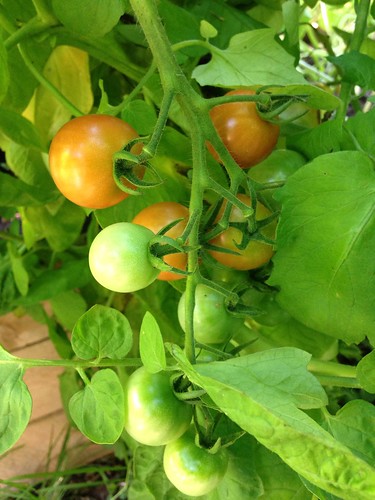
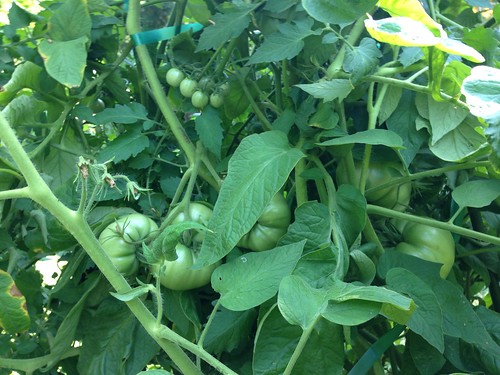
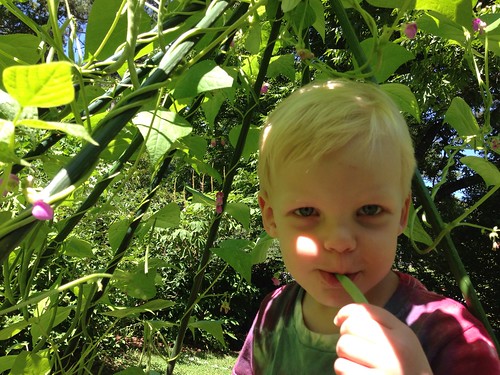
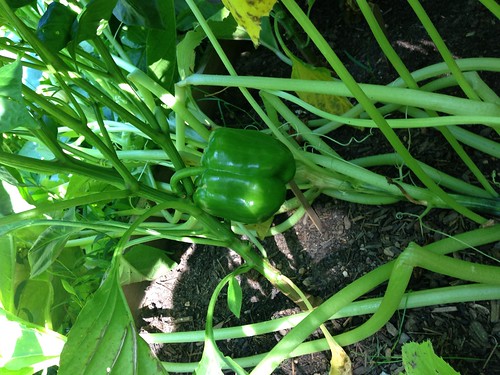
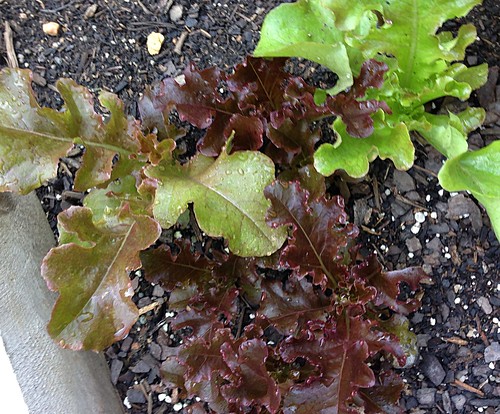
The garden has been growing well. We already have more zucchini than we can use, the Rattlesnake pole beans are producing lots of dinner side dishes and Griff snacks (he eats them raw off the vines like a woodchipper), and the cherry tomatoes have just finally started to ripen. The Brandywine tomatoes are numerous (at least 20) but still very green. We have a couple baby Sugar Baby watermelons and Pike muskmelons in progress as well as several Betterbush butternut squash headed into their final ripening. The cucumbers are producing enough for salads and snacks. Our big win overall this year has been salad greens: the lettuce and spinach have all being doing extremely well both in spring and summer. We have lots of small bell and sweet banana peppers, but none ripe yet.

Butternut squash

Sugar Baby watermelon

Any's Apricot tomatoes

Brandywine OTV tomatoes

Eating the Rattlesnake pole beans

Hungarian sweet banana peppers

Jupiter Bell Pepper

Oakleaf lettuce

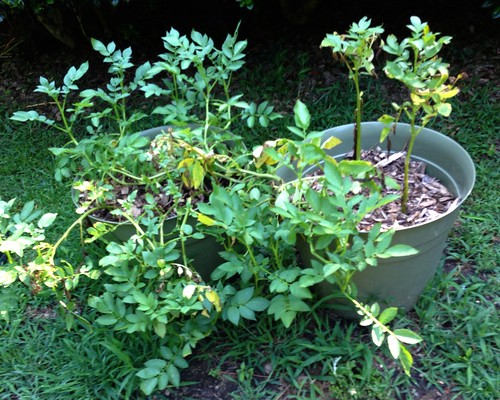
We have some Yukon Gold potatoes growing in containers (we ran out of raised bed space); we planted them in the very bottom and have been gradually filling the containers with soil and mulch to keep any tubers covered. They went through a period where it looked like they were nitrogen deficient. They seemed to recover after some fertilizing, but now they’re all leggy and hanging over the sides and I have no clue if we’ll get any potatoes or not. I’m planning to wait until the plants die off and then dump the pots over and see what we end up with. Next year I’ll plant them in the ground like a normal person.

Container potatoes

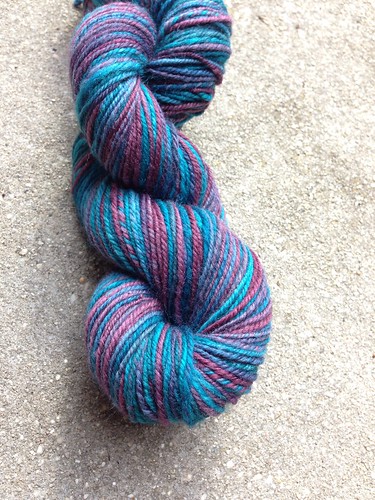
I’ve wrapped up the sewing projects I really wanted to work on, so now I’m feeling the yarn love again. I finished chain-plying some Shetland that I dyed a while back and I’m very happy with it, considering how sporadic my spinning has been and how out of practice I am. It’s only 100g (not sure on yardage yet), so I’m not sure what I’ll use it for.

3-ply Shetland

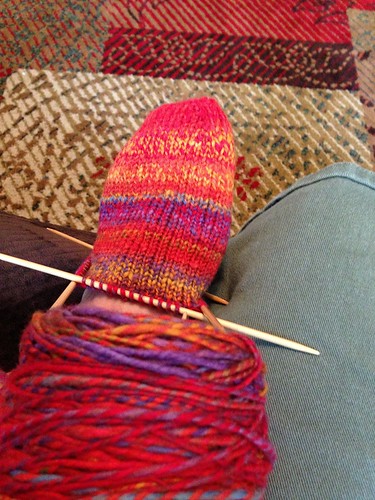
I have a ton of handspun just sitting around, so on our drive to the beach I used Wendy Johnson’s “Socks from the Toe Up” (an emergency purchase right before we left) to finally figure out Judy’s Magic Cast On and start on some toe up socks. (Toe-up socks result in less waste/running out of yarn when you have a limited amount of yarn; you weigh the yarn ball, knit the first sock toe to cuff until half the yarn is used, then knit the other sock with the remaining yarn. This way you get two socks with equal-length cuffs and don’t run out of yarn, say, with 2″ left to go on the second sock toe.) The yarn is DK to worsted, and I’m using size 3 needles, so it’s going quick. I do love me some 2-ply barberpole clown barf yarn, yes I do.

Handspun sock

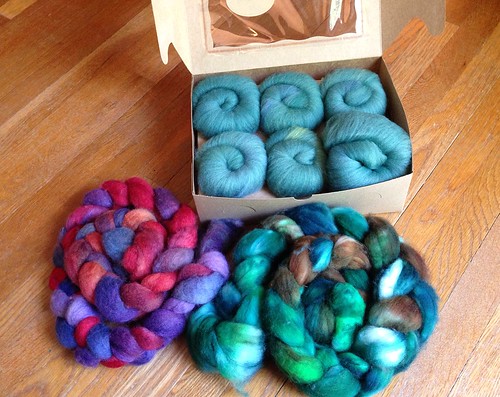
The Tour de Fleece starts tomorrow! I’ve picked out some fiber to spin and joined one of the general purpose TDF groups on Ravelry. First up will be some Cupcake Fiber Company Corriedale/nylon sock batts that Sean bought for me as a gift a while back. If I manage to finish spinning and plying that, I have some Blueface Leicester and some superwash merino that I dyed ages ago that will come next. At this point I’m only committing myself to at least 15 minutes a day, which I think is doable and should result in at least one finished skein of yarn before the time is up.

Tour de Fleece 2013

THE END!

Comments: Comments Off on A month’s worth of blogging in one post

Archives

Categories